


When Concrete Cracks: Choosing the Right Epoxy Repair That Lasts
Epoxy concrete repair is one of the most reliable ways to fix cracked, spalled, or damaged concrete — but only when you use the right product for the right job.
Quick Answer: What Is Epoxy Concrete Repair?
| Question | Answer |
|---|---|
| What is it? | A two-component adhesive system (resin + hardener) that bonds to damaged concrete |
| What does it fix? | Cracks, spalls, holes, voids, and uneven surfaces |
| How strong is it? | Up to 12,000+ psi compressive strength — often stronger than the original concrete |
| Best for | Structural cracks, foundation repairs, heavy-traffic floors |
| Not ideal for | Active water leaks, moving cracks, or cracks wider than 1/4 inch |
| Typical cure time | 4–6 hours for light foot traffic; full cure in 24 hours to 5 days |
Concrete is tough — but it’s not indestructible. Heavy loads, freeze-thaw cycles, soil movement, and simple age all cause cracks to form. Left alone, those cracks get bigger. Water gets in. Pests follow. And what started as a hairline crack becomes a serious structural problem.
The good news? Not every crack means a full replacement. Many can be fixed permanently with the right epoxy product and proper technique.
But here’s the catch: not all epoxy products work the same way. A thin injection resin designed for hairline cracks will fail in a wide spall. A heavy paste meant for horizontal floors won’t hold on a vertical wall. Choosing wrong means doing the job twice.
This guide cuts through the noise and shows you exactly which products hold up — and which ones don’t.
I’m Darin Garvey, founder of Basement Waterproofing Scientists, with over 30 years of combined experience diagnosing and repairing foundation and concrete damage in the Philadelphia area. I’ve seen every type of epoxy concrete repair scenario — from hairline foundation cracks to heavily spalled warehouse floors — and I know which products and methods actually deliver lasting results. Let’s walk through what works.
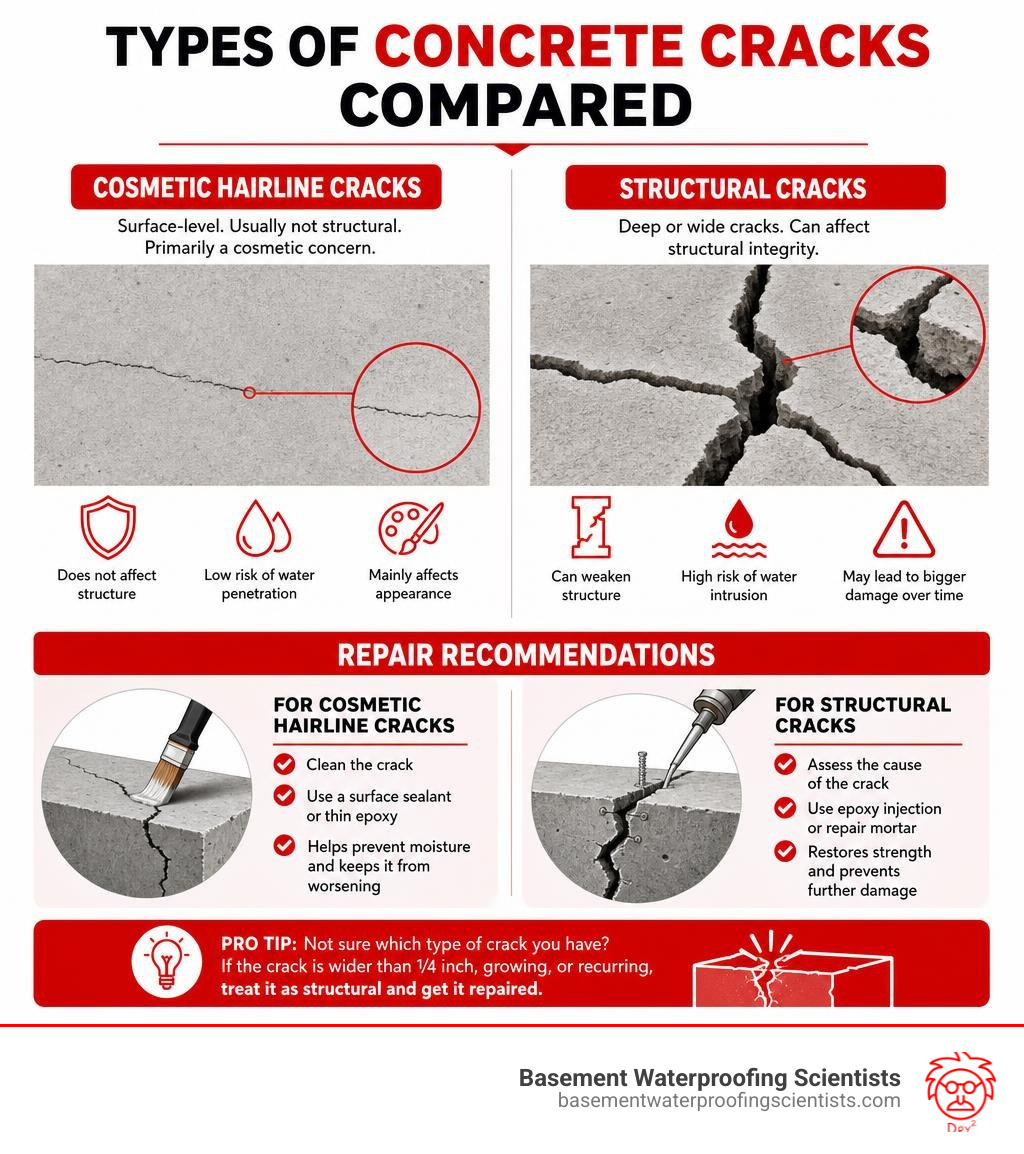
Epoxy concrete repair basics:
Understanding Epoxy Concrete Repair: Science and Benefits
To understand why epoxy concrete repair is so effective, we have to look at the chemistry. Epoxy is not a simple filler or cosmetic caulk. It is a two-part thermosetting polymer consisting of an epoxy resin (Part A) and a curing agent or hardener (Part B).
When these two components mix, they undergo a chemical reaction that forms cross-linked polymer chains. This reaction is exothermic (it generates heat) and transitions the material from a liquid or paste into a highly durable, rigid solid.
The magic of epoxy lies in its molecular bonding capability. As it cures, the epoxy penetrates the microscopic pores, fissures, and rough textures of the existing concrete. This creates a mechanical and chemical bond that is incredibly difficult to break.
According to structural standards like the ASTM C881 standards for epoxy resin, professional-grade repair epoxies must meet strict performance metrics for bond strength, compressive yield, and water absorption.
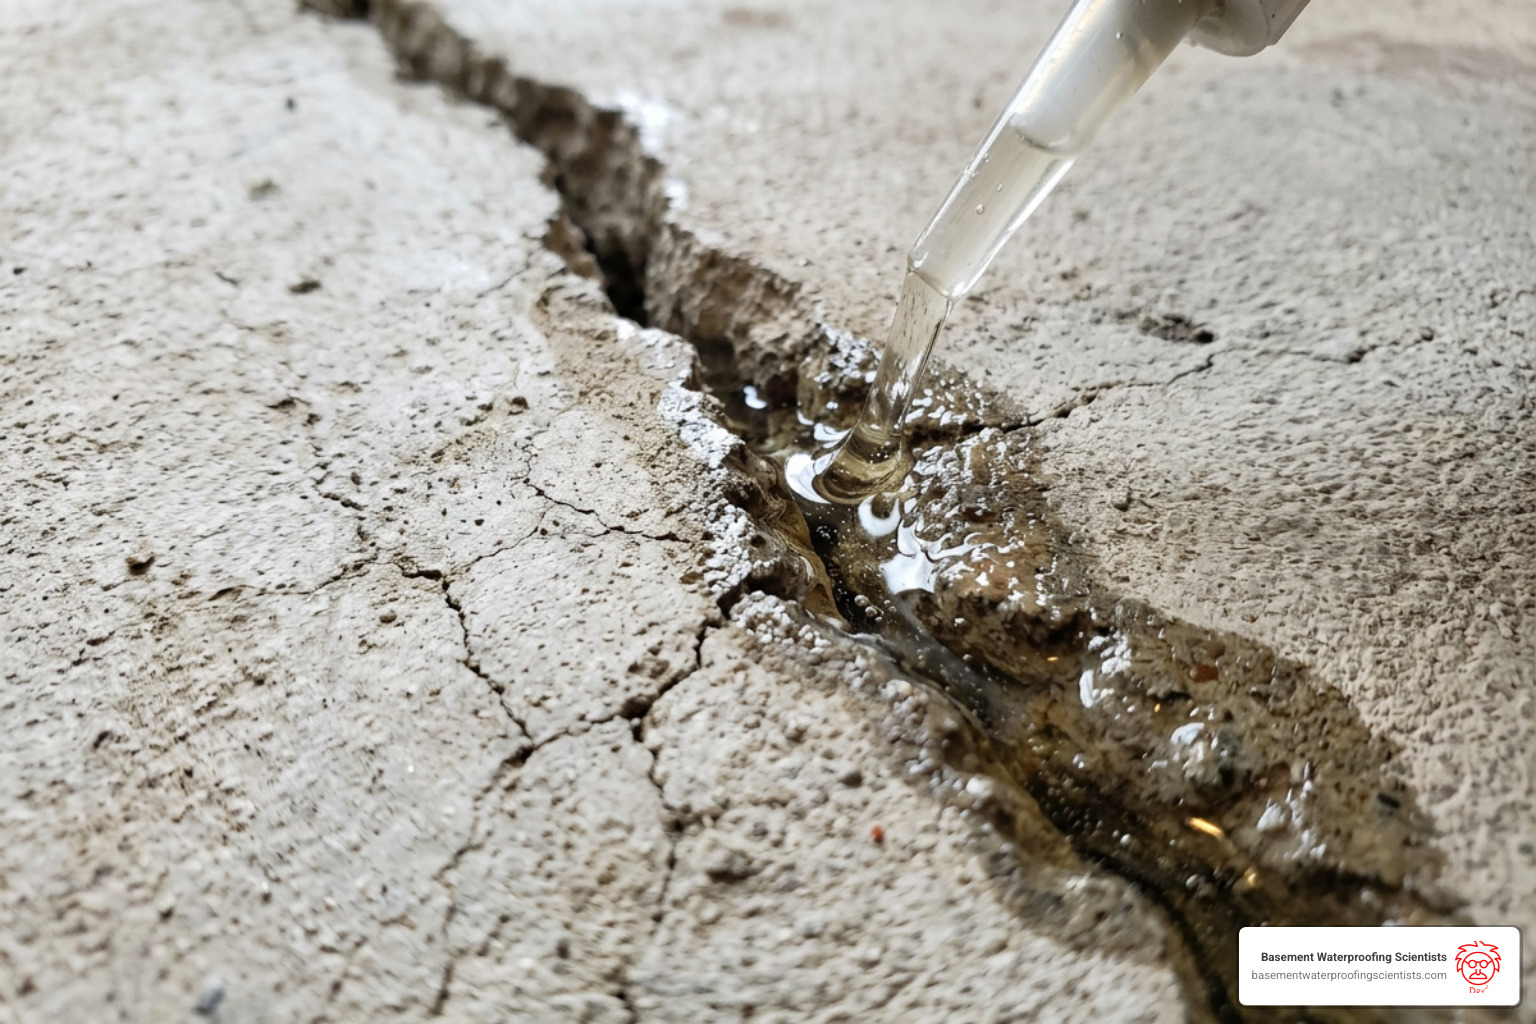
This massive difference means that when we perform an epoxy crack injection on a foundation wall, the repaired crack actually becomes stronger than the surrounding concrete itself. If the concrete experiences extreme stress in the future, a new crack will typically form next to the repair rather than through the cured epoxy.
How Epoxy Concrete Repair Compares to Polyurethane
When dealing with cracked basement walls or concrete floors, homeowners often wonder whether to use epoxy or polyurethane. Both materials have their place, but they serve completely different structural purposes.
The fundamental difference lies in rigidity versus flexibility:
- Epoxy is rigid. It is a structural adhesive designed to weld concrete back together. It restores the structural integrity of the wall or floor. If you have a foundation crack that is threatening the stability of your home, epoxy is the correct choice.
- Polyurethane is flexible. It is an elastomeric foam or gel designed to expand up to 20 times its volume when it encounters moisture. It is excellent for waterproofing active water leaks in non-structural cracks that may expand and contract with seasonal temperature changes.
If there is active foundation movement, a rigid epoxy repair may crack again nearby as the wall shifts. However, if the goal is to stop structural shearing or reinforce a load-bearing surface, polyurethane simply cannot provide the necessary compressive or tensile strength.
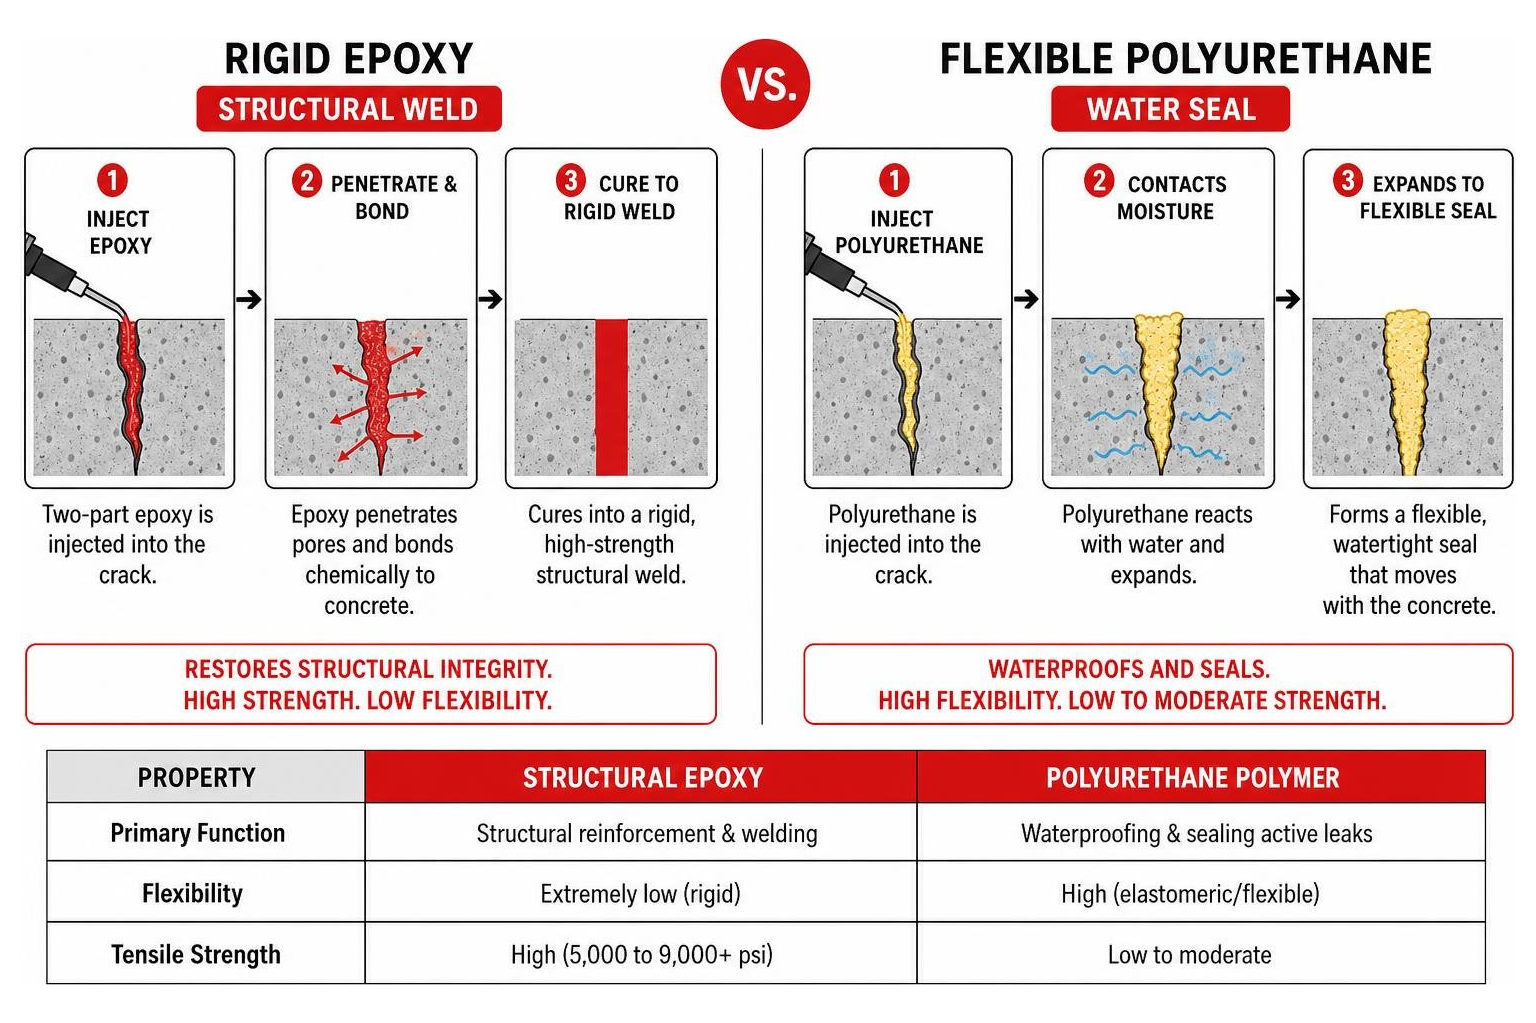
| Property | Structural Epoxy | Polyurethane Polymer |
|---|---|---|
| Primary Function | Structural reinforcement & welding | Waterproofing & sealing active leaks |
| Flexibility | Extremely low (rigid) | High (elastomeric/flexible) |
| Tensile Strength | High (5,000 to 9,000+ psi) | Low to moderate |
| Expansion | Zero shrinkage (100% solids) | High expansion (fills large voids) |
| Wet Surfaces | Requires dry concrete for best bond | Can cure in wet or active leak conditions |
Selecting the Right Epoxy Concrete Repair Product for Your Project
Choosing the right epoxy isn’t just about grabbing the first tube you see on the shelf. You need to match the product’s physical properties to your specific repair scenario:
- Viscosity (Thickness): Liquid epoxies range from ultra-low viscosity (water-like) to heavy pastes. Hairline cracks require low-viscosity resins that can penetrate deep into the crack via gravity or pressure injection. Large holes or spalls require high-viscosity pastes or mortars.
- Gel Time (Working Time): Once mixed, epoxy begins to harden. Some fast-setting formulas gel in 5 to 10 minutes, which is great for quick patches but terrible for complex injections. Structural injection resins typically have a working time of 20 to 60 minutes.
- Surface Orientation: Horizontal surfaces allow you to use pourable, self-leveling epoxies. However, vertical or overhead repairs require non-sag epoxy properties that cling to the surface without running or dripping.
- Delivery System: For small DIY fixes, dual-chamber cartridges with static mixing nozzles are incredibly convenient. For major foundation repairs, you will want to look into professional buying basement crack injection kits that include injection ports, capping paste, and low-viscosity resins.
Top Epoxy Concrete Repair Products on the Market
To help you find the right tool for the job, we have rounded up some of the most reliable and highly rated epoxy repair products available in July 2026. These products range from quick-fix retail sealants to professional-grade structural mortars.
High-Strength Epoxy Cartridges and Sealants
For localized repairs, small cracks, and quick bonding jobs, dual-cartridge systems are the go-to choice.
- Quikrete 8.6 oz. Epoxy Concrete Repair Sealant (Product No. 862049): A highly accessible option with 156 customer reviews. This product is a two-component epoxy bonding system packaged in a single cartridge that fits standard caulk guns. It features a non-sag formula, making it excellent for vertical repairs of 1/2 inch or larger. You can find this easily at major retailers; see the Quikrete 8.6 oz. Epoxy Concrete Repair Sealant listing for availability.
- PC Products PC-Concrete Epoxy Adhesive Paste: Boasting 1,785 customer reviews and a 4.4-star rating, this is a heavy-duty structural epoxy paste. It is moisture-insensitive, meaning it can be applied to damp concrete, and it cures to a light gray color that blends well with standard concrete.
- J-B Weld 50112 ClearWeld 5 Minute Set Epoxy: With a massive 8,472 customer reviews and a 4.5-star rating, this is a household staple. While not designed for deep structural foundation cracks, it is a fantastic quick-setting adhesive for small, detailed concrete bonding and cosmetic repairs.
- J-B Weld 50176 KwikWeld Steel Reinforced Epoxy: Featuring 3,832 customer reviews and a 4.6-star rating, this steel-reinforced formula offers incredibly fast curing and high impact resistance, perfect for anchoring bolts or repairing chipped edges.
Comprehensive Foundation Crack Injection Kits
If you are dealing with a vertical foundation crack in your basement, a simple surface paste won’t cut it. You need a pressurized injection system to fill the crack from front to back.
- Applied Technologies 10′ Fast Set Concrete Foundation Crack Repair Kit: With 611 customer reviews, a 4.4-star rating, and over 100 kits bought in the past month, this is a highly trusted system. It includes rapid-setting capping paste and low-viscosity structural injection resin designed to seal up to 10 linear feet of foundation cracks.
- RadonSeal Concrete Foundation Crack Repair Kit: This kit has earned 996 customer reviews and a 4.5-star rating, with over 200 bought in the past month. It is highly favored by both DIYers and professionals for its comprehensive instructions and reliable, deep-penetrating polyurethane and epoxy injection options. To understand how to execute these repairs like a pro, check out our guide on mastering epoxy injection.
Heavy-Duty Epoxy Mortars and Pastes
When you have deep potholes, spalls, or large chunks of missing concrete on floors or steps, you need high-build epoxy mortars that can be built up to an inch or more in thickness.
- Sika Repair-EP – Epoxy Repair Mortar with Quartz Fillers: This is a professional-grade, 2-component epoxy repair and forming mortar. It features different colored components to ensure visual confirmation of proper mixing. It has a high compressive strength of approximately 77 N/mm² (over 11,000 psi) and cures without shrinkage. It is ideal for horizontal repairs up to 60mm deep and vertical repairs up to 25mm. Learn more directly from the Sika Repair-EP epoxy mortar technical specifications.
- Rust-Oleum 301012 Concrete Patch & Repair: With 972 customer reviews, a 4.4-star rating, and 200+ units bought in the past month, this is a highly popular retail epoxy mortar. It is a 100% solids industrial-strength formula that cures stronger than concrete and does not shrink, making it perfect for deep spalls and heavy-traffic garage floors.
- PC Products PC-Masonry Epoxy Adhesive Paste: This product has 352 customer reviews and a 4.6-star rating, with 100+ bought in the past month. It is a high-viscosity paste designed specifically for vertical and overhead masonry reconstruction.
Step-by-Step Guide to Applying Epoxy Concrete Repair
Applying epoxy is a precise science. If you rush the preparation or mess up the mixing, the epoxy will not cure properly, resulting in a sticky, weak mess that must be mechanically scraped out. Follow this professional three-phase process to ensure a permanent bond.
Phase 1: Surface Preparation and Cleaning
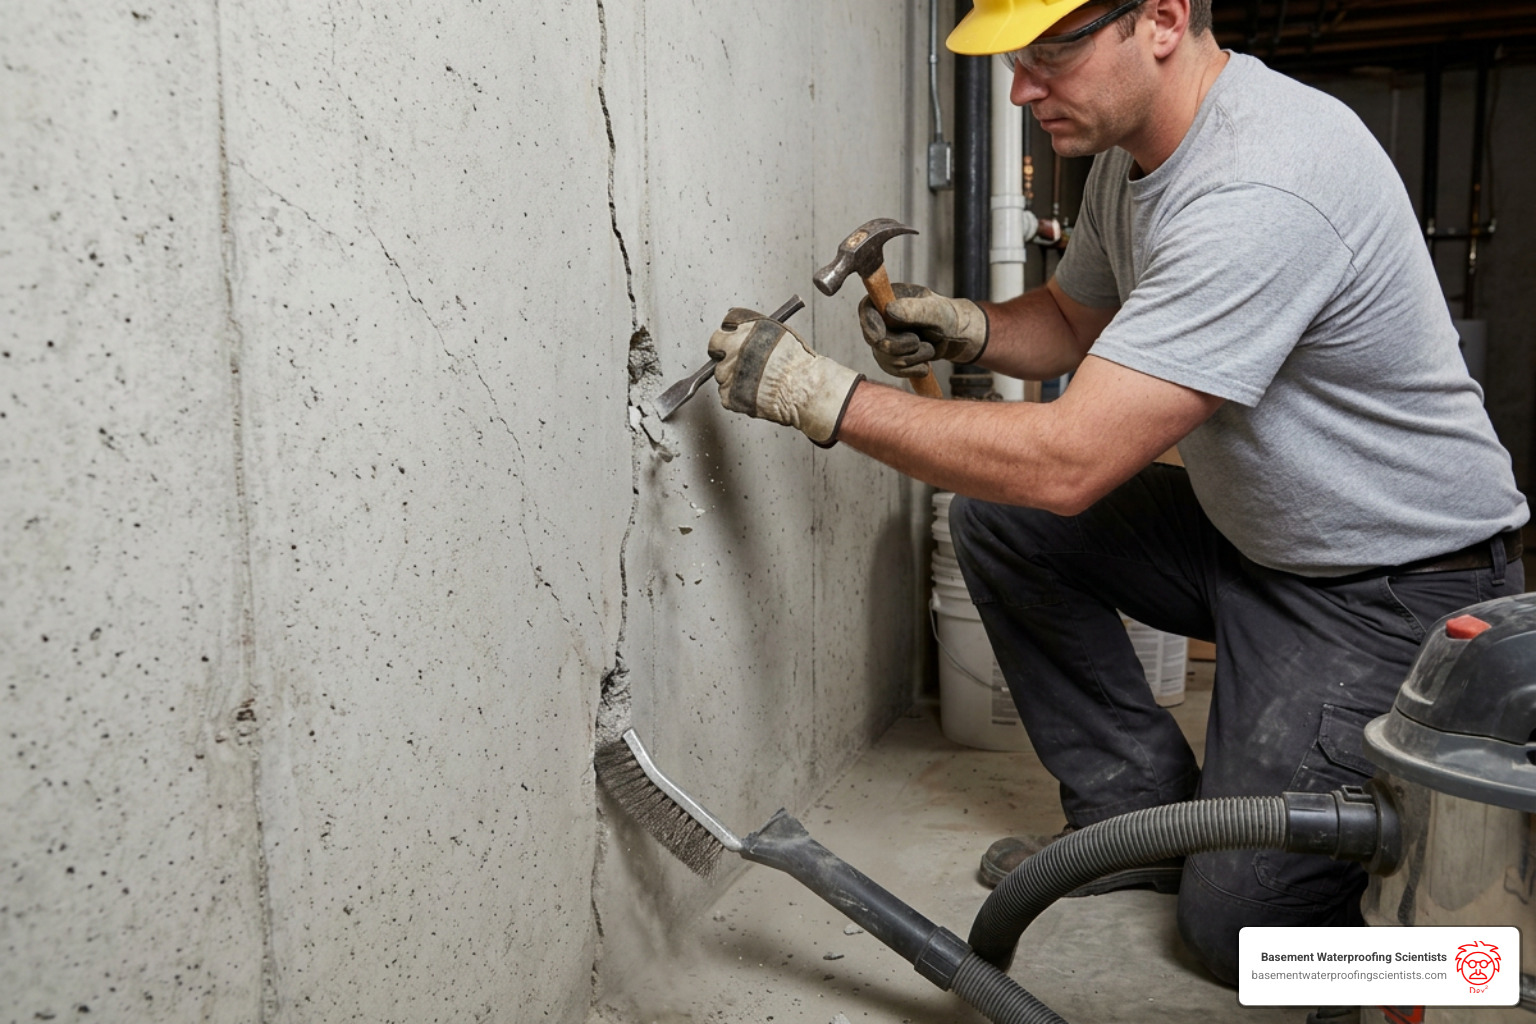
Ask any professional contractor, and they will tell you: 90% of epoxy failure is caused by poor surface preparation. Epoxy will not bond to dirt, grease, loose concrete dust, efflorescence, or old paint.
- Chisel and Wire Brush: Use a cold chisel and hammer to remove any loose or crumbling concrete along the crack or spall. Wire brush the area vigorously to loosen stubborn debris.
- Mechanical Profiling: For large patches, use a concrete grinder or wire wheel to create a rough, textured profile. This gives the epoxy more surface area to grab onto.
- Vacuum Thoroughly: Use a heavy-duty shop vacuum to suck out every speck of dust from deep inside the crack.
- Dry the Substrate: Standard structural epoxies require a completely dry surface to achieve maximum bond strength. If the concrete is damp, dry it with a heat gun or propane torch. For detailed preparation requirements, refer to these surface preparation guidelines.
Phase 2: Mixing and Dispensing the Epoxy
Most structural repair epoxies utilize an easy 1:1 mix ratio by volume.
- Using Dual Cartridges: Slide the cartridge into a professional dual-component gun. Before attaching the static mixing nozzle, squeeze a small amount of material onto a scrap piece of cardboard to ensure both Part A and Part B are flowing evenly.
- Attaching the Nozzle: Screw on the static mixing nozzle. As you squeeze the trigger, the two components are forced through a series of plastic baffles inside the nozzle, mixing them thoroughly before they exit.
- Bulk Mixing: If you are using a bulk kit, measure equal parts of A and B. Use a low-speed drill (under 400 RPM) with a Jiffy mixer paddle. Mix for at least 3 minutes until the material is a uniform gray color with absolutely no streaks. Keep an eye on your pot life — once mixed, you typically have only 15 to 30 minutes to apply the material before it begins to gel.
Phase 3: Injection and Patching Application
For structural crack injection on basement walls:
- Set the Ports: Space plastic injection ports along the crack, spaced roughly 6 to 12 inches apart (typically equal to the thickness of the foundation wall). Use a small dab of epoxy paste around the base of the port to secure it over the crack, ensuring you do not block the central entry hole.
- Apply the Capping Paste: Spread a thick layer of epoxy capping paste over the entire surface of the crack between the ports. This seals the front of the crack so the liquid injection resin doesn’t squirt out during injection.
- Inject from the Bottom Up: Once the capping paste has cured (usually a few hours), start injecting your low-viscosity resin into the lowest port. We recommend a high-modulus, low-viscosity resin like Epojet NA injection resin. Inject slowly until the liquid resin begins to flow out of the next port up. Cap the bottom port, move your nozzle to the second port, and repeat the process all the way to the top of the wall.
For horizontal patching:
- Pour your mixed epoxy mortar or paste into the spall or hole.
- Use a steel trowel to pack the material firmly into the void, eliminating air pockets.
- Trowel the surface flush with the surrounding concrete. To prevent the epoxy from sticking to your trowel, lightly mist the blade with water or isopropyl alcohol.
Frequently Asked Questions about Concrete Repair
How long does epoxy concrete repair take to cure?
Cure times depend heavily on ambient and substrate temperatures. At a standard room temperature of 75°F (24°C), most repair epoxies reach a tack-free state in 3 to 4 hours.
- Light foot traffic: Allowed after 4 to 6 hours.
- Heavy vehicular traffic: Safe after 24 to 36 hours.
- Full chemical cure: Achieved in 3 to 5 days.
If temperatures drop below 50°F (10°C), the chemical reaction slows down dramatically, and curing can take twice as long. Never apply standard epoxy if temperatures are expected to drop below 40°F (4°C) unless you are using a specialized cold-weather formula.
Can epoxy concrete repair be used on vertical or overhead surfaces?
Yes, but you must use the correct product. Standard low-viscosity injection resins are highly fluid and will run straight out of a vertical crack or drip off an overhead ceiling.
For vertical and overhead patching, you must select a non-sag epoxy paste or mortar. These products have a thick, peanut-butter-like consistency that clings to vertical surfaces in layers up to 1/2 inch to 1 inch thick without sagging or slipping during the curing process.
What are the most common mistakes to avoid during epoxy concrete repair?
- Applying over wet concrete: Moisture acts as a barrier, preventing the epoxy from bonding with the concrete’s pores. The repair will eventually peel off.
- Inadequate mixing: If you see streaks of white or black in your cured epoxy, it wasn’t mixed thoroughly. It will remain soft, tacky, and structurally useless.
- Ignoring active structural movement: If your foundation wall is actively bowing or settling due to hydrostatic pressure or soil failure, a rigid epoxy repair will simply crack again. You must address the underlying soil or structural issues first.
Conclusion
When executed correctly, epoxy concrete repair is an incredibly durable, permanent solution that can save you thousands of dollars compared to concrete replacement. However, structural foundation cracks are often a symptom of larger issues, such as poor yard drainage, soil hydrostatic pressure, or foundation settlement.
If you are dealing with recurring cracks, bowing basement walls, or water intrusion in the Philadelphia, Reading, or Bensalem areas, don’t guess at the solution.
At Basement Waterproofing Scientists, we bring 30 years of experience to every project. We use specialized diagnostic equipment to find the exact source of your basement leaks, allowing us to fix them permanently for less. Our average cost for comprehensive basement waterproofing ranges between $4K and $8K, and our structural repairs are backed by a lifetime guarantee.
Let us handle the heavy lifting. Schedule a professional foundation inspection with us today and get peace of mind knowing your home is standing on solid ground.