

Why Your Basement Needs a Drainage Solution
An installing interior drain tile system is one of the most effective ways to create a permanently dry, usable basement. Here’s what the process involves:
Quick Overview: Interior Drain Tile Installation Steps
- Remove concrete around the basement perimeter to create a trench
- Dig out soil to expose the foundation footing
- Lay a gravel base in the trench for drainage
- Install perforated pipe to collect and channel water
- Connect to a sump pump that pumps water away from your home
- Cover with gravel and pour new concrete to restore the floor
Average Cost: Between $60-$100 per linear foot (total project: $4,000-$8,000)
Timeline: 1-3 days for professional installation
A damp basement threatens your home’s structure and your family’s health.
According to industry data, 98% of basements in the U.S. will experience some form of water damage. The culprit is hydrostatic pressure—the force of groundwater pushing against your foundation walls and floor.
Water enters through cracks, joints, and porous concrete, causing dampness, odors, mold, and foundation damage. An interior drain tile system manages this water before it enters your living space. It captures groundwater at the foundation, directs it to a sump pump, and relieves the pressure, keeping your basement dry.
While a DIY approach is tempting, it’s a difficult job. It requires jackhammering, digging, hauling debris, and ensuring proper drainage slopes and code compliance. Mistakes are often buried under new concrete, making them costly to fix.
With over 30 years in basement waterproofing, I’ve seen many successful installations and failed DIY attempts. This guide uses that experience to explain what a proper installation involves and why professional expertise is crucial.

Understanding Interior Drain Tile Systems and Their Benefits
An interior drain tile system, also known as a French Drain in Basement, is a sub-floor drainage network that manages water before it becomes visible. It’s your home’s underground defense against water intrusion.
The system works by relieving hydrostatic pressure—the relentless force of groundwater pressing against your foundation. By capturing this water at the source and directing it away, the system prevents leaks, flooding, and long-term moisture problems.
What is Hydrostatic Pressure and How Does a Drain Tile System Help?
After heavy rain or snowmelt, water saturates the soil around your foundation, creating immense hydrostatic pressure. This force pushes water through any weak spot—hairline cracks, porous concrete, or the cove joint where the wall meets the floor.
Installing interior drain tile system solves this by intercepting water at its source. Placed next to the foundation footings below the floor, the system collects groundwater before pressure builds. The water is channeled to a sump pump and removed from your home. This eliminates the pressure, addressing the root cause of water issues, which is key to effective Wet Basement Repair.
Key Signs You Need an Interior Drain Tile System
While standing water is an obvious sign, many warnings are more subtle. If you notice any of the following, your basement needs a permanent solution.
- Water stains on basement walls, especially near the bottom, show where water has seeped in.
- Efflorescence is a white, chalky powder on concrete left by evaporating water, proving moisture is moving through your walls.
- Puddles on the floor, or even small, recurring wet spots, are clear signs of trouble.
- A musty, earthy smell often indicates mold or mildew.
- Visible mold growth means the moisture problem is now a health hazard.
- Peeling paint is caused by moisture trapped behind the paint.
- A constantly damp and clammy feeling indicates persistent high humidity.
- Cracks in your basement walls or floor become pathways for water and can worsen under hydrostatic pressure.
For a more comprehensive look at these warning signs, check out our guide on 8 Signs Your Basement Needs Waterproofing.
The Main Benefits of a Dry Basement
Installing interior drain tile system is an investment in your home’s future and your family’s well-being.
- Protects your foundation: Relieving hydrostatic pressure protects your foundation from cracks and settling, helping you avoid expensive future repairs.
- Increases property value: A waterproofed basement is a major selling point for homebuyers, adding significant value and usable square footage.
- Creates usable living space: You can finally finish your basement to create a home office, gym, or playroom without worrying about water damage.
- Prevents mold and improves air quality: A dry basement prevents mold and mildew, eliminating allergens. This improves air quality not just in the basement, but throughout your entire home as air circulates upward.
- Protects stored belongings: Your stored belongings, from family photos to furniture, will remain safe and dry.
These benefits make a strong case for addressing basement water problems permanently. To explore the full range of solutions available, visit our page on Basement Waterproofing Solutions.
The Step-by-Step Process for Installing an Interior Drain Tile System
A professional installation is a precise, multi-day process. Each step is critical for a lasting result. Our experienced crew of five to six technicians can typically transform your basement in one to three days, depending on its size and complexity.

Step 1: Preparation and Concrete Removal
First, we clear the perimeter of your basement by moving any obstructions. Our team then uses jackhammers to remove a 12 to 18-inch wide strip of concrete around the edge of the floor.
Breaking concrete is dusty, but we take extensive measures to control it. We seal off living areas with plastic sheeting, use industrial air scrubbers, and apply water suppression techniques. After breaking the concrete, we haul away all debris, leaving a clean trench for the next step.
Step 2: Trenching and Laying the Gravel Base
Next, we dig a trench down to the foundation footing. This precise depth ensures the drain tile sits at the lowest possible point to collect water before it can get under your floor. A key professional detail is avoiding the “mud zone” directly beneath the slab, which can clog the system. Our system is installed above this zone for long-term function.
Once the trench is properly sloped, we lay a base of clean, washed three-quarter-inch drainage rock. This gravel base provides stability and acts as a preliminary filter.
Step 3: Installing the Perforated Pipe
The core of the system is the perforated pipe, or Drainage Tiles. We use durable perforated PVC or flexible plastic pipes. The small weep holes are positioned facing downward to maximize water collection from below while keeping debris out from above.
The pipe is laid on the gravel bed with a precise slope to ensure gravity carries water efficiently to the sump pit. We securely connect all sections for a continuous, leak-free path. For block foundations, we may also drill weep holes into the block cores to release trapped water directly into the system.
Step 4: Connecting to the Sump Pump System
The collected water flows to a sump pump system. We install a durable sump pit at the lowest point in the basement, where the drain tile terminates.

Inside, we place a high-quality primary sump pump and highly recommend a battery backup pump. The backup ensures protection during power outages, which often occur during heavy storms. The pump pushes water through a discharge line at least 20 feet away from your foundation to prevent it from re-entering the soil. Proper slope on this line is crucial to prevent freezing. Learn more in our guide to Basement Sump Pump Installation.
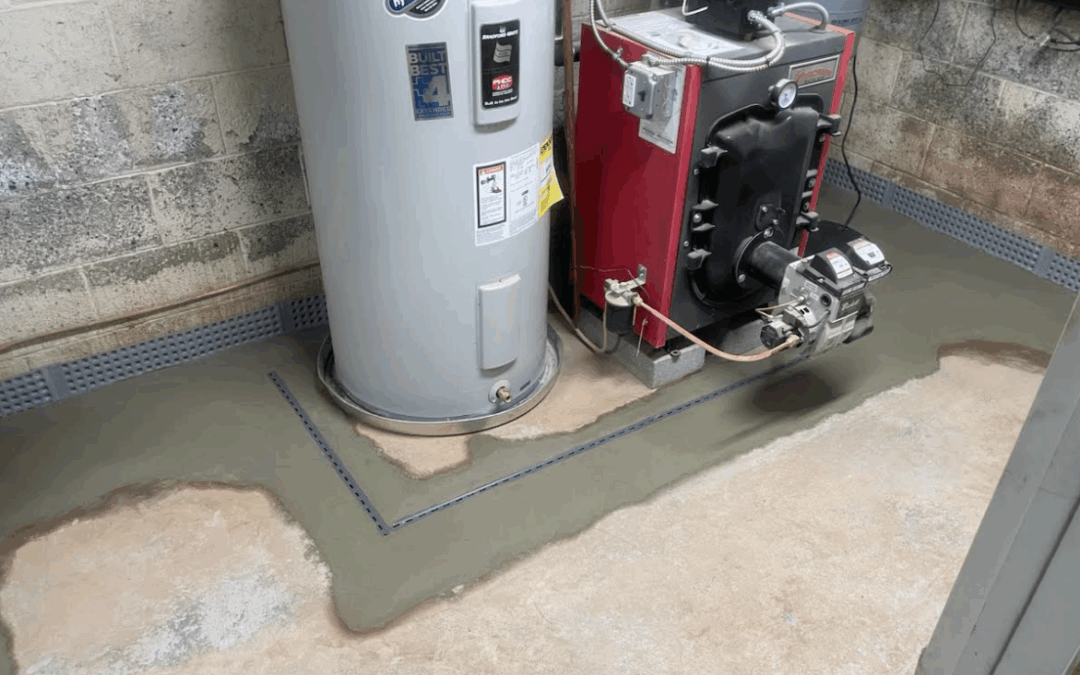
Step 5: Final Gravel Layer and Concrete Restoration
To finish, we cover the pipe with another layer of clean gravel. This additional gravel improves filtration and protects the pipe. We may also add a filter fabric for extra protection against clogging.
Next, we restore your basement floor by pouring new concrete, finishing it to match the existing floor. The new concrete requires 24 to 48 hours to cure before normal use. Finally, we conduct a thorough site cleanup, vacuuming and removing all materials. When the installing interior drain tile system is complete, your basement is left clean, dry, and protected.
Key Decisions: Interior vs. Exterior and DIY vs. Professional
Choosing the right system and installation method is crucial. An interior system is often the most practical and cost-effective solution for existing homes, but understanding the alternatives helps you make an informed decision.
Interior vs. Exterior Drain Tile Systems
There are two main approaches: interior and exterior drain tile systems.
Interior systems are installed inside your basement to collect water that has reached your foundation. This is the most common solution for existing homes because it’s less disruptive—your landscaping, deck, and driveway remain untouched. The system is also easily accessible for maintenance.
Exterior systems are installed around the outside of your foundation to intercept water before it reaches the walls. This is ideal for new construction but requires extensive excavation for existing homes, making it more disruptive and costly. Learn more about them in our guide on Drainage Tiles Around House.
Here’s a quick comparison:
- Cost: Interior systems typically cost $60-$100 per linear foot. Exterior systems may seem cheaper per foot, but total project costs are often higher due to excavation and landscape restoration.
- Installation Time: An interior system takes 1-3 days, while an exterior system can take a week or more.
- Disruption: Interior work is contained in the basement. Exterior work involves major yard excavation.
- Maintenance: Interior systems are easy to access and maintain. Buried exterior systems are difficult to service and more prone to clogging from roots and silt.
In some cases, a dual system combining both methods offers the best protection. Explore this in our article on the Benefits of Dual Approach: Interior and Exterior Basement Waterproofing.
DIY vs. Professional: The Risks of Installing an Interior Drain Tile System Yourself
While the cost savings of a DIY project are tempting, we strongly advise against it for installing interior drain tile system. Here’s why:
- It’s brutally physical work. Jackhammering concrete, digging trenches, and hauling tons of debris is exhausting and takes a professional crew several days to complete.
- It requires specialized equipment. Renting industrial jackhammers, concrete saws, and dust control systems is expensive, and using them without experience is dangerous.
- The risk of costly mistakes is high. An incorrect slope, improper trench depth, or digging too close to the footing can lead to system failure or even structural damage. These mistakes are often finded only after new concrete is poured, requiring a complete and expensive do-over.
- Code compliance is mandatory. Professionals understand local building codes for drainage and electrical work, ensuring your installation passes inspection.
With 30 years of experience, Basement Waterproofing Scientists has the expertise and specialized equipment to do the job right. Our work is backed by a lifetime guarantee. While professional installation costs between $4,000 and $8,000, it provides peace of mind and prevents the costly errors of a DIY attempt. Learn more on our Drain Tile Installation Cost page.
System Maintenance and Potential Challenges
Once installed, an interior drain tile system is a low-maintenance solution designed to work passively. However, understanding potential issues and performing simple checks can ensure it continues to protect your home effectively for decades.

Common Problems and How to Avoid Them
Most potential problems are preventable with proper installation and basic maintenance.
- Clogging: This is a common concern. Our interior systems are installed in a “clear water zone” and surrounded by washed gravel and filter fabric to prevent silt and debris from entering the pipe.
- Sump Pump Failure: The pump is the heart of the system. We strongly recommend a battery backup pump to ensure your basement stays dry during power outages.
- Improper Slope: A mistake during installation can cause water to pool in the pipes. Our professional crews use precision grading to guarantee proper flow to the sump pit.
- Discharge Line Freezing: In cold climates, a frozen discharge line can cause water to back up. We install lines with the correct slope and freeze-resistant extensions to prevent this.
- Debris in the System: While our systems are designed to resist debris, regular inspections can catch any rare sediment buildup before it becomes an issue.
Routine Maintenance for Your Drainage System
Professional installing interior drain tile system requires minimal maintenance.
- Test your sump pump annually. Pour a bucket of water into the pit to ensure the pump activates, discharges the water, and shuts off correctly.
- Clear the discharge outlet. Regularly check the exterior discharge pipe to ensure it’s free of leaves, dirt, or other blockages.
- Visually inspect the pit. Every few months, look inside the pit for excess debris or sediment.
- Listen during storms. You should hear your pump cycle on and off during heavy rain. If it runs constantly or not at all, it may need attention.
- Schedule professional inspections. Every few years, have a professional check the system to catch potential issues early. This proactive step protects your investment and maintains your lifetime guarantee.
Frequently Asked Questions about Installing an Interior Drain Tile System
It’s natural to have questions about installing interior drain tile system. Here are answers to some of the most common ones:
How long does it take to install an interior drain tile system?
A professional installation typically takes between 1 and 3 days. The exact time depends on your basement’s size and complexity. An average-sized basement usually takes our experienced crew about two days to complete.
Will the installation process create a lot of dust and mess?
Yes, breaking concrete creates dust. However, our professional crews take extensive measures to contain it. We use industrial-grade air scrubbers, seal off living areas with plastic sheeting, and employ dust suppression techniques. After the work is done, we perform a thorough cleanup, hauling away all debris and leaving your basement tidy.
Is an interior drain tile system a permanent solution for a wet basement?
Yes, when installed by experienced professionals, an interior drain tile system is a permanent waterproofing solution designed to last the lifetime of your home. It solves the root cause of most water issues by managing groundwater and hydrostatic pressure. Proper installation is key, which is why our work at Basement Waterproofing Scientists is backed by a lifetime guarantee. We use specialized equipment to identify the exact source of water entry, ensuring an effective and efficient repair. Learn more in our guide, How Do You Completely Waterproof a Basement?.
Secure Your Home with a Professional Drainage System
Installing interior drain tile system is a valuable investment in your home, but it’s a complex job where precision is critical. A small mistake can lead to system failure. Given the technical skill and physical labor required, trusting an experienced professional is the only way to guarantee a lasting solution.
At Basement Waterproofing Scientists, our 30 years of experience have taught us how to diagnose and solve any water problem. Our unique advantage is using specialized equipment to pinpoint the exact source of leaks, allowing us to fix the problem efficiently and for less. We don’t guess—we provide precise, effective solutions.
Our process begins with an expert inspection to design a customized plan for your home. We stand behind our work with a lifetime guarantee, giving you peace of mind. We proudly serve homeowners throughout Pennsylvania, New Jersey, and Delaware.
Your basement can be a valuable, dry space.
Ready to solve your water problems for good? Learn more about our Basement Drain Systems and schedule your expert inspection today. Let’s get your basement dry—permanently.