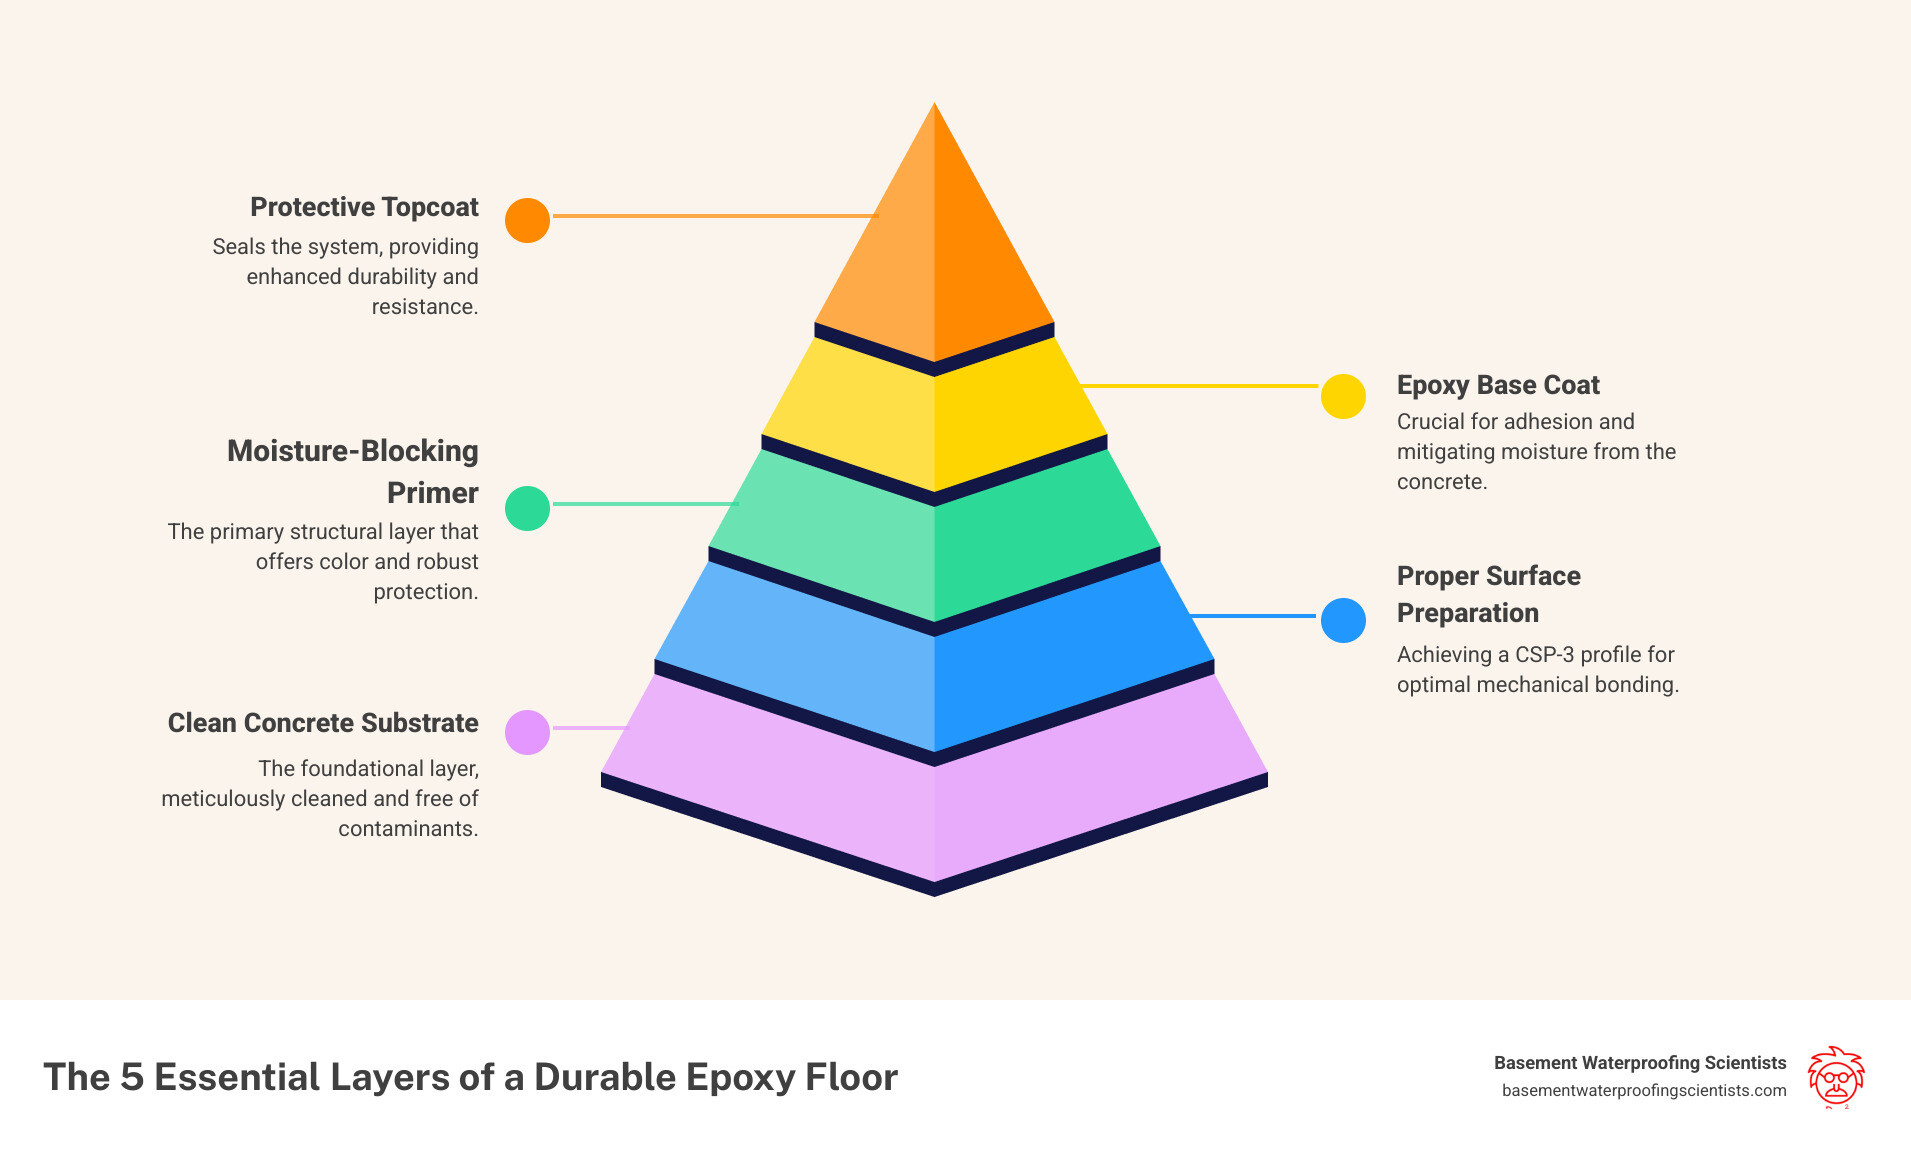
Why Your Basement Floor Deserves Better Than a Quick Fix
Prepping basement floor for epoxy is the difference between a stunning, durable floor that lasts decades and a frustrating DIY disaster that peels and bubbles within months. Many homeowners rush into epoxy application without proper preparation, only to watch their investment literally fall apart.
Essential Steps for Prepping Basement Floor for Epoxy:
- Assess concrete condition – Check for cracks, moisture, and contamination
- Clean thoroughly – Remove all dirt, grease, and loose material
- Repair defects – Fill cracks and level uneven areas
- Create proper surface profile – Achieve CSP-3 through grinding or etching
- Apply primer – Ensure maximum adhesion and moisture protection
- Test for moisture – Critical for preventing future failures
The truth is, epoxy coating failure almost always traces back to inadequate surface preparation. As one industry expert puts it: “Quality epoxy floors begin with surface preparation.” When you skip crucial prep steps, you’re setting yourself up for peeling, bubbling, and adhesion problems that will cost more to fix than doing it right the first time.
Your basement represents significant potential – whether for storage, recreation, or even additional living space. But moisture issues and poor flooring choices can quickly turn this valuable area into a liability. A properly prepped and applied epoxy floor creates a waterproof barrier that protects your concrete while providing an attractive, easy-to-clean surface that can withstand whatever your family throws at it.
I’m Darin Garvey, and over 30 years of basement waterproofing experience has taught me that prepping basement floor for epoxy correctly prevents most coating failures I see. Whether you’re tackling this as a DIY project or working with professionals, understanding these preparation steps will ensure your basement change succeeds.

Key terms for prepping basement floor for epoxy:
Why Proper Prep is the Key to a Flawless Epoxy Floor
Imagine spending your precious weekend changing your basement floor, dreaming of a shiny, new space. You carefully apply that beautiful, glossy epoxy coating. Then, just a few short months later, you start to notice it: bubbling, peeling, or even delaminating right off the concrete. It’s truly disheartening, and unfortunately, it’s a story we hear all too often when the foundation of the project – proper surface preparation – is overlooked.
Here at Basement Waterproofing Scientists, with decades of experience solving basement issues, we’ve seen just how crucial the initial groundwork is. Epoxy coatings are amazing! Once cured, they’re incredibly tough and resistant to moisture, grease, scuffs, and chemicals. But here’s the secret: they are only as strong as their bond to the concrete underneath. If that bond isn’t absolutely perfect, the coating simply won’t last.
When you do it right, the benefits of a properly applied epoxy floor are truly impressive:
- Durability and Longevity: Epoxy creates a super strong bond with your concrete, making it incredibly resistant to daily wear and tear. This means your floor can look great and last for many years, even decades, with just a little care.
- Aesthetic Appeal: Say goodbye to that drab, gray concrete slab! Epoxy can transform your basement into a vibrant, appealing space. You can choose from solid colors, decorative flakes, or even metallic finishes to truly improve your basement’s look.
- Moisture Resistance: This is especially vital in basements, which are naturally prone to dampness. A well-applied epoxy coating forms a waterproof barrier, protecting the concrete beneath and helping to prevent mold or mildew growth.
- Chemical Resistance: Spills happen! Whether it’s household cleaners, oils from a workshop project, or even some harsher substances, a properly applied epoxy floor can handle it. Cleanup becomes a breeze.
- Low Maintenance: Once it’s down, an epoxy floor is wonderfully low-maintenance. A simple sweep and occasional mop are usually all it takes to keep it looking fantastic.
But here’s the hard truth: none of these amazing benefits matter if the coating doesn’t stick. The vast majority of epoxy failures – including that frustrating peeling, bubbling, and those dreaded adhesion issues – can be traced directly back to inadequate preparation. Think of it like trying to paint a dirty, greasy wall; no matter how good the paint, it just won’t adhere properly. The very same principle applies to your concrete basement floor.
This is why we can’t stress enough that prepping basement floor for epoxy isn’t just a suggestion; it’s an absolute, non-negotiable requirement for success. Skipping these crucial steps is truly a shortcut to disappointment and costly re-dos. Our main goal is to ensure your basement change is a lasting success, not just a temporary fix. For a deeper dive into how epoxy can truly protect your basement from water, be sure to check out our insights on Epoxy Basement Floor Waterproofing.
The Step-by-Step Guide to Prepping Basement Floor for Epoxy
Starting an epoxy flooring project can feel a bit like preparing for a gourmet meal. The better your ingredients and the more carefully you do your prep work, the more delicious the final result will be! Here, your “ingredients” are your concrete and the epoxy, and the “prep work” is everything you do to get that concrete just right.
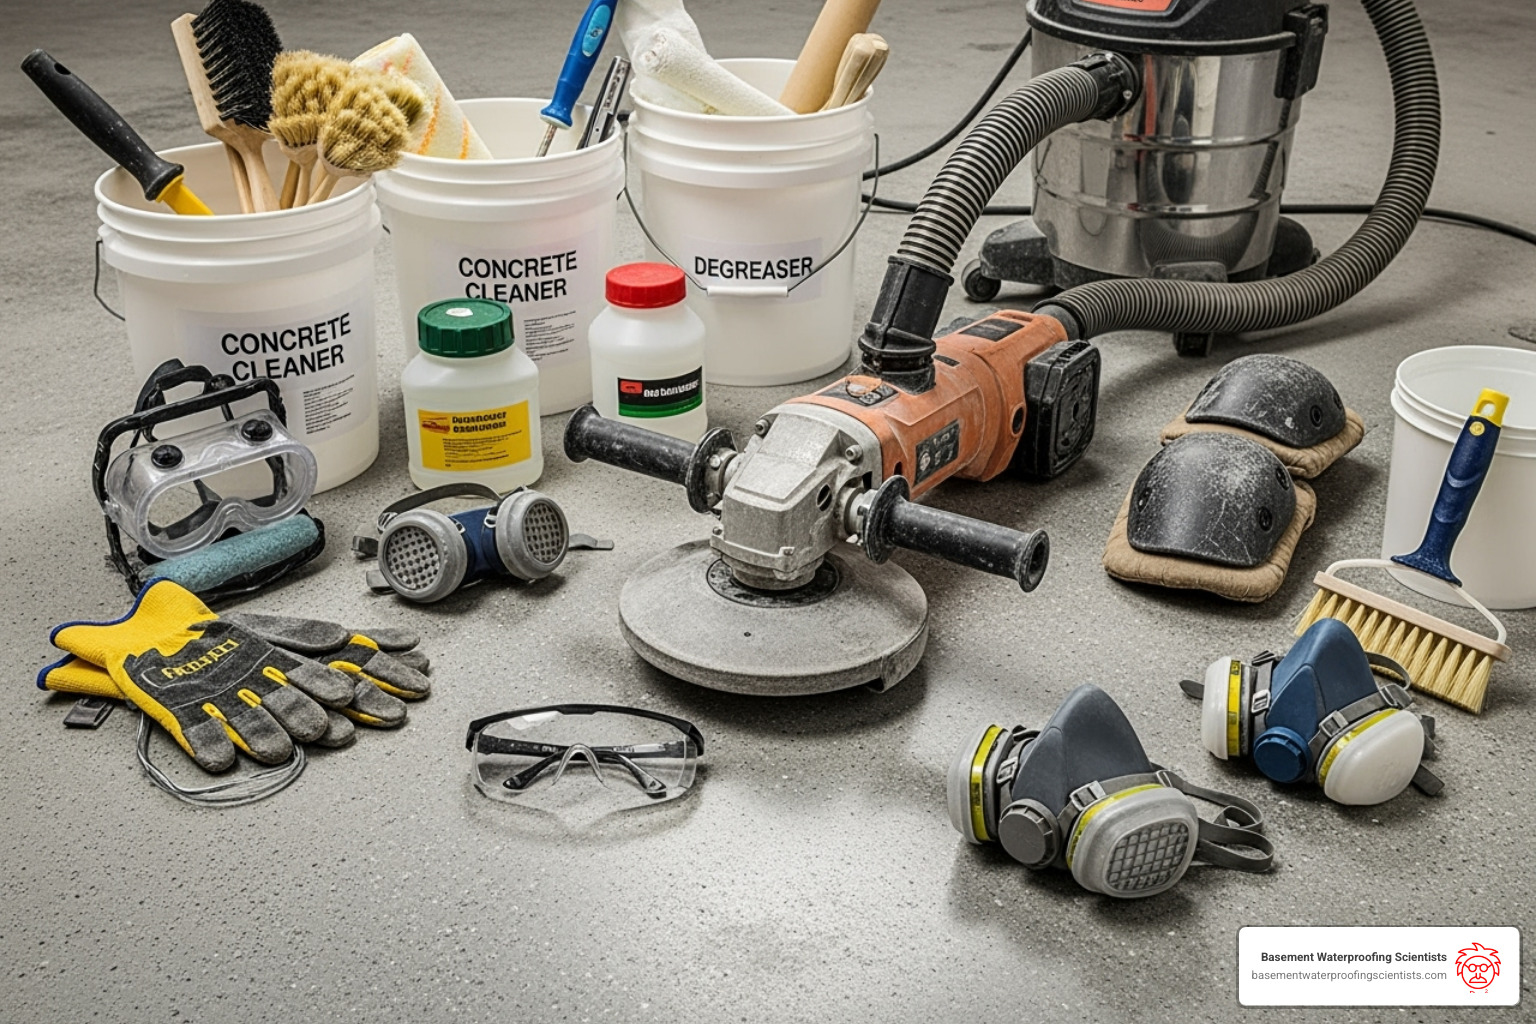
Before we dive into the details, let’s talk about getting ready. You’ll need various tools and materials, from cleaning supplies to a concrete grinder. Take a look at the image below to get an idea of what you’ll need. And remember, safety is always first! We’re dealing with power tools and chemicals, so proper protective gear isn’t just a suggestion; it’s a must. Expect this preparation phase to take a big chunk of your project timeline – sometimes even longer than applying the epoxy itself! But trust us, it’s time very well spent.

Step 1: Assessing Your Concrete for Prepping Basement Floor for Epoxy
Before we even think about cleaning or grinding, we need to play detective and thoroughly inspect your concrete floor. This assessment phase is super important because it helps us understand any challenges we might face and how much work lies ahead.
First, take a good, close look at your floor. Are there any existing cracks, chips, or areas of spalling (where the concrete surface is flaking or pitting)? Also, look for efflorescence – those white, powdery deposits. They’re a tell-tale sign that moisture is moving through your concrete. All these clues will help us plan our repair strategy.
Next, and this is probably the most crucial step for any basement, is moisture testing. Concrete is naturally porous, and basements are famous for moisture problems. This moisture can come from the ground pushing water up (hydrostatic pressure) or just from condensation. Here’s the thing: epoxy hates moisture. If there’s too much moisture in the concrete slab, the epoxy simply won’t stick, or it will fail way too soon.
We recommend a simple but effective plastic sheet test:
- Tape a 2×2 foot plastic sheet (a garbage bag works just fine!) tightly to the concrete floor using duct tape on all four sides.
- Leave it undisturbed for 24 hours.
- After 24 hours, check for condensation under the plastic or any dark spots on the concrete. If you see either, you have a moisture problem. This needs to be dealt with before you apply epoxy.
It’s really important to remember that Moisture issues may not be immediately apparent. Sometimes, the problem hides until you seal the floor. If your moisture test shows issues, consider it a big red flag. For serious or ongoing moisture problems, getting a professional assessment is key. With our decades of experience, we specialize in finding and fixing these issues, making sure your basement stays dry for good. You can learn more about how we tackle these challenges in our Waterproofing Your Basement: A Homeowner’s Guide.
Finally, we test for contamination. Old oil stains, grease, paint, or even just dust can stop the epoxy from sticking properly. A quick way to check for contamination is with a water drop test. Pour a small amount of water on the surface. If the concrete absorbs the water, you likely don’t have a contamination issue. But if the water beads up and doesn’t soak in, there might be a problem. For stubborn dirt, you might need special degreasers or more intense cleaning.
Step 2: Cleaning, Degreasing, and Repairing
With our assessment done, it’s time to get down and dirty – literally! This step is all about making sure the surface is perfectly clean and ready for the epoxy to bond.
First, start with the basics: sweeping and vacuuming. Get rid of all loose dirt, debris, and dust. A shop-vac with a HEPA filter is perfect for this, especially after any grinding you might do later.
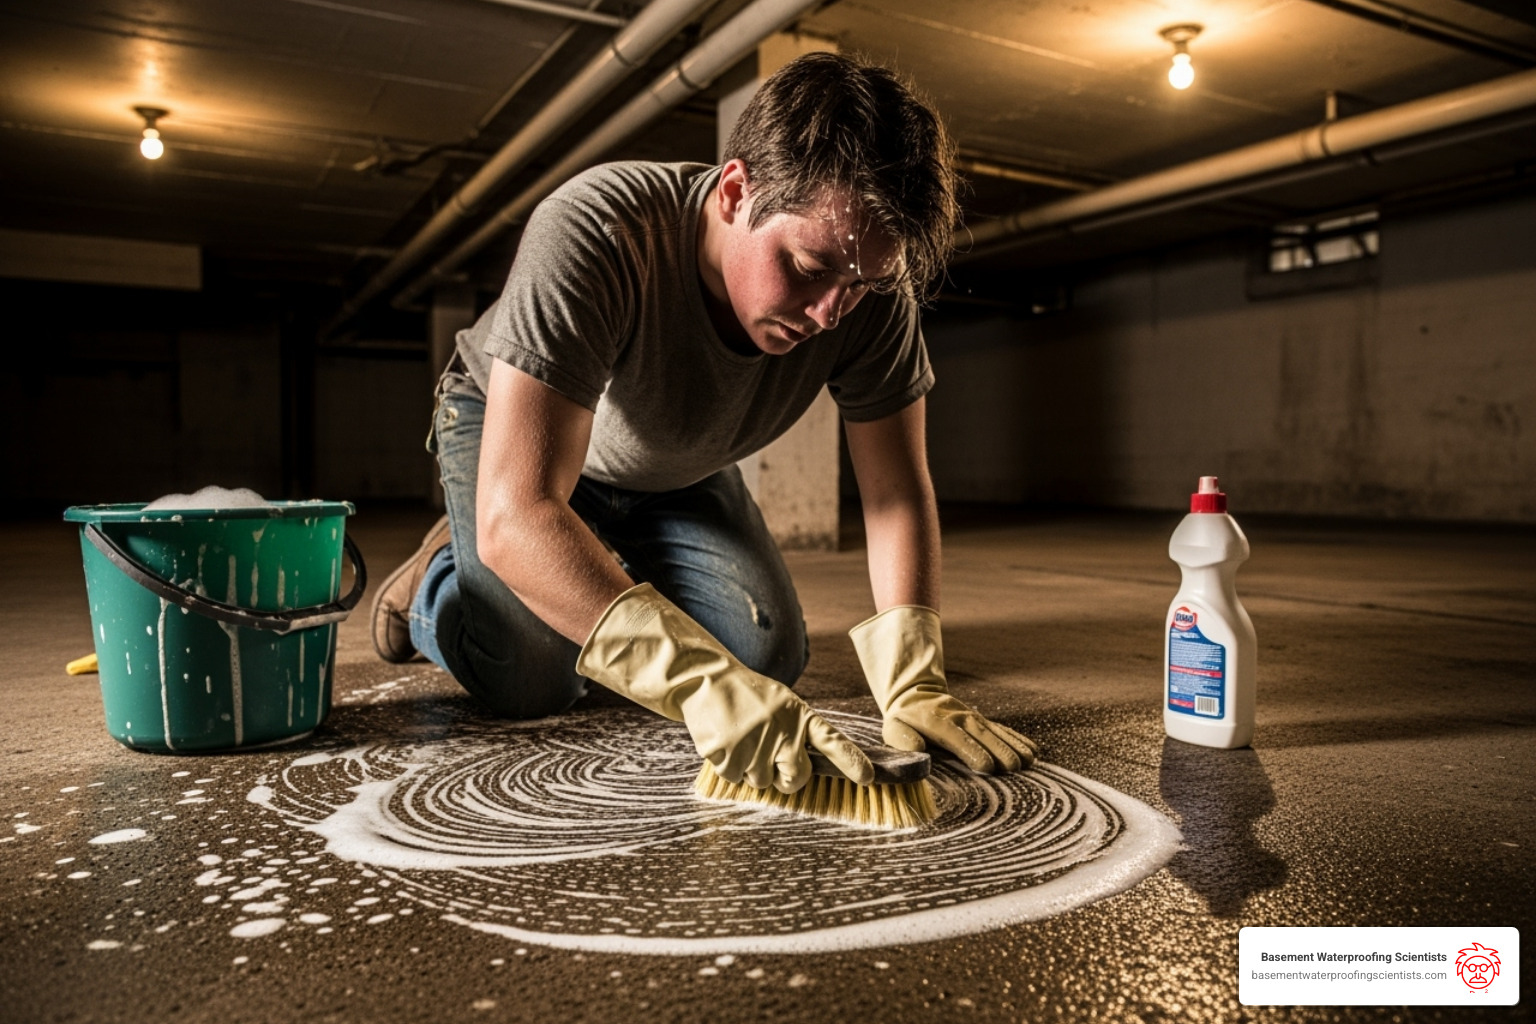
Next, we tackle the grease and grime. If your basement has been used for years, maybe as a workshop or laundry area, it’s probably collected oil and grease stains. You’ll want to scrub the surface with a strong detergent in warm water to remove these unwanted guests. For really stubborn spots, a concrete degreaser (like Tri-sodium phosphate, or TSP, if it’s allowed in your area) applied with a stiff brush can work wonders. After cleaning, rinse the floor thoroughly to make sure all cleaning solution residue is gone. New concrete needs to cure for at least 30 days before you apply epoxy. Any existing concrete needs to be completely clean and dry!

Once the floor is clean and completely dry, it’s time for repairs. Fill any cracks, holes, or spalled areas with a good quality concrete patching compound. For cracks and holes, a durable two-part resin-based patcher paste is often a great choice. Follow the manufacturer’s instructions and let it dry completely. For uneven spots, especially on older or damaged floors, a concrete grinder can help smooth them out, creating a nice, uniform surface for the epoxy.
Essential Safety Gear (Seriously, Don’t Skip These!):
- Eye Protection: Safety glasses or goggles are a must, especially when grinding or using chemicals.
- Respiratory Protection: A respirator mask with the right filters is vital to protect against concrete dust and chemical fumes.
- Gloves: Wear chemical-resistant gloves when handling degreasers, etching solutions, or epoxy.
- Long Sleeves and Pants: Protect your skin from splashes and scrapes.
- Knee Pads: Your knees will definitely thank you later!
- Adequate Ventilation: Open windows, use fans, and make sure there’s plenty of fresh air to clear out fumes. Protective gear and good ventilation are key to a safe working environment.
Step 3: Achieving the Perfect Profile When Prepping Basement Floor for Epoxy
This step is all about creating the “tooth” or texture that the epoxy needs to grab onto. It’s called the Concrete Surface Profile (CSP), and it’s absolutely critical for a strong mechanical bond. Think of it like putting wallpaper on a wall – you wouldn’t put wallpaper on a super smooth, glossy surface, right? You need some texture for it to stick!
For most epoxy floor applications, the minimum required CSP is level three (CSP-3). This feels a bit like medium-grit sandpaper. If your surface is too smooth, the epoxy won’t have anything to grip, and it could peel away. If it’s too rough, you’ll use too much epoxy, and your floor might not look perfectly even.
There are several ways to get the right CSP:
| Method | Pros | Cons | Best Use Cases |
|---|---|---|---|
| Mechanical Grinding | Excellent control over CSP, dust control with a vacuum, removes old coatings. | Can be labor-intensive for large areas, equipment rental costs. | Most common and highly recommended for both DIY and professional projects. Great for achieving CSP-3 and fixing minor imperfections. |
| Shot Blasting | Very effective for large areas, creates a uniform CSP, ideal for super strong bonds. | Equipment is expensive, can be very messy without proper containment, not good for small, tricky areas. | Large basements, commercial spaces, and industrial applications where a very aggressive profile is needed. |
| Acid Etching | Inexpensive, relatively easy for small areas, no special equipment needed (beyond safety gear). | Less consistent CSP, doesn’t remove contaminants, leaves chemical residue, generally not recommended for epoxy. | Light residential use, only for very clean and porous concrete where mechanical methods aren’t possible (but still risky for epoxy, often leads to the problems we discussed earlier!). |
Our strong recommendation, and what many professionals agree on, is mechanical grinding. Mechanical grinding is far better than acid etching for preparing concrete surfaces for epoxy. It gives you a much more consistent and effective profile, which means superior adhesion and a floor that lasts much longer. While acid etching is cheaper and easier, it often doesn’t create a deep enough or consistent enough profile. Plus, it can leave behind residues that stop the epoxy from bonding well. This is how you end up with that frustrating peeling problem!
For most basement floors, a diamond grinder with the right grinding pads will help you achieve the necessary CSP-3. Always work carefully and make sure you cover the entire surface evenly. After grinding, vacuum the entire floor again thoroughly to remove all concrete dust. For more detailed information on surface profiles, you can explore resources like Understanding concrete surface profiles.
Choosing and Applying the Right Primer
You’ve put in all that hard work cleaning, repairing, and grinding your concrete. Now comes a step that some DIYers try to skip – but trust me, you don’t want to be one of them. Prepping basement floor for epoxy includes choosing and applying the right primer, and it’s absolutely crucial for long-term success.
Think of primer as the matchmaker between your concrete and epoxy. Without it, they might not get along very well, and nobody wants a relationship that ends in peeling and bubbling a few months down the road!

Here’s why primer isn’t optional – it’s essential. First, it improves adhesion by soaking deep into your porous concrete, creating a bridge that your epoxy can really grab onto. Without this bridge, even perfectly prepped concrete might not provide enough grip.
Second, primer seals the porosity of your concrete. Concrete is basically a hardened sponge. When epoxy cures, it can pull air bubbles up through those tiny pores, leaving you with a floor that looks like Swiss cheese. Nobody wants that!
For basements specifically, moisture-mitigating primers are often your best friend. These specialized primers can handle higher levels of moisture vapor, giving you extra protection against the dampness that basements are famous for. If your plastic sheet test showed borderline moisture levels, this type of primer can be a lifesaver.
Finally, primer creates a uniform surface that helps your final epoxy coat go on smoother and more evenly. It’s like using a good foundation before applying makeup – everything just looks better.
When choosing your primer, make sure it’s compatible with your epoxy system. Many quality epoxy kits include a recommended primer, which takes the guesswork out of matching products. For basement applications, we typically lean toward moisture-mitigating formulas because basements and moisture go together like peanut butter and jelly – whether you want them to or not!
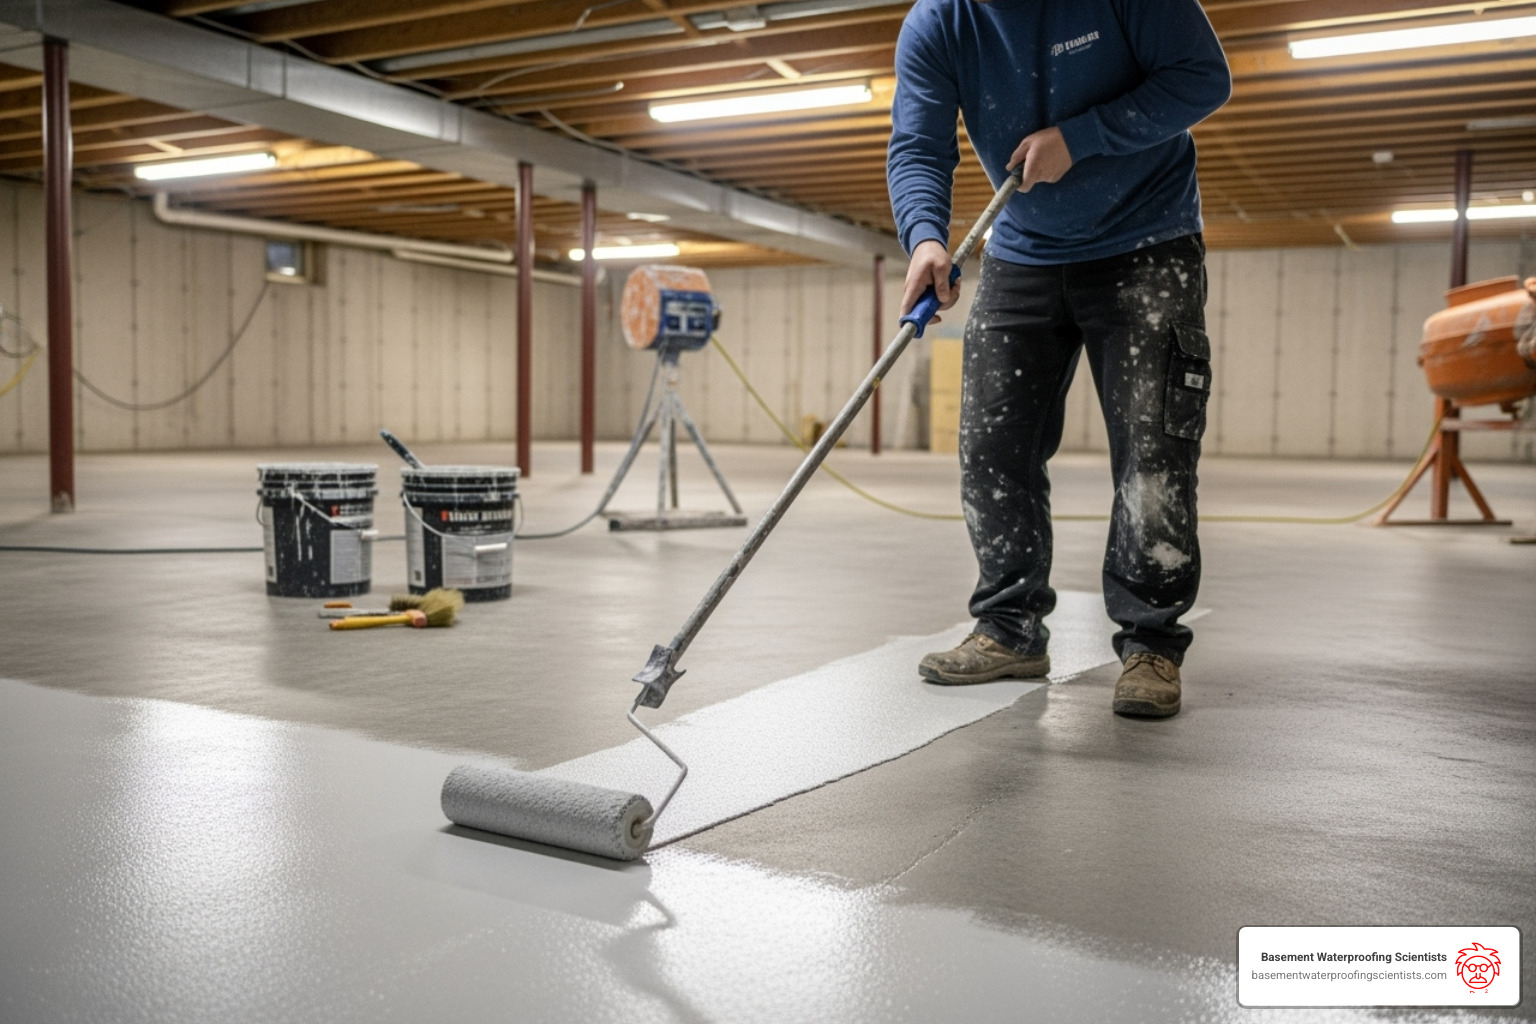
Application is straightforward, but attention to detail matters. Mix your primer components exactly according to the manufacturer’s instructions – no shortcuts here. Apply it evenly using a roller with the right nap (usually 3/8-inch or 1/2-inch works well) or a squeegee for larger areas, then back-roll to ensure even coverage.
Work systematically from the farthest corner of your basement toward your exit – you don’t want to paint yourself into a corner, literally! Allow the primer to cure completely for the recommended time before applying your epoxy topcoat. Rushing this step is like trying to build a house on a foundation that’s still wet.
The type of epoxy you’re planning to use might influence your primer choice. Water-based epoxy systems are often easier to work with and have lower odor, while solvent-based options can provide extra durability against petroleum products. High-solids epoxy systems are becoming popular for their environmental friendliness and reduced smell – important considerations in a basement space.
For more detailed guidance on application techniques, check out our comprehensive guide on Applying Epoxy Paint to Concrete Floor.
Proper priming is what separates the basement floors that look great for decades from the ones that become cautionary tales. Don’t skip this step – your future self will thank you when you’re still admiring your beautiful, intact floor years from now.
Frequently Asked Questions about Basement Epoxy Prep
We get a lot of questions about prepping basement floor for epoxy, and rightly so! It’s a significant project. Here are some of the most common queries we encounter:
How long does new concrete need to cure before applying epoxy?
Patience is a virtue, especially with new concrete. While new concrete typically needs to cure for 30 days before applying epoxy, we often recommend waiting 60 days for full strength and moisture release. This extended curing time allows the concrete to fully harden and, more importantly, to release a significant amount of its trapped moisture.
Applying epoxy too soon means you’re essentially sealing in moisture. This will inevitably lead to bubbling, peeling, and adhesion failure as the moisture tries to escape. Always perform a moisture test, even on cured new concrete, to be absolutely sure it’s ready. It’s better to wait a little longer than to deal with a big headache later!
What are the most common mistakes to avoid during prep?
Oh, where do we begin? We’ve seen them all, and they almost always lead to disappointment. Here are the top mistakes to steer clear of when prepping basement floor for epoxy:
First, skipping the moisture test. This is probably the number one culprit for epoxy failure in basements. If you don’t know your concrete’s moisture content, you’re rolling the dice. As we’ve stressed, epoxy and moisture don’t mix!
Next, improper cleaning. Any dirt, dust, grease, oil, or previous coatings left on the surface will act as a bond breaker. The epoxy will stick to the contaminant, not the concrete, leading to peeling. “Clean” means pristine, not just “looks clean.”
Don’t make the mistake of ignoring cracks and imperfections. Small cracks can become big problems. If you don’t repair them, they can continue to expand, show through the epoxy, or allow moisture to seep under the coating.
Then there’s creating an incorrect surface profile. If your floor is too smooth, the epoxy won’t stick. If it’s too rough, you’ll use too much product and have a bumpy finish. Getting that CSP-3 is Goldilocks-level important – just right!
And please, whatever you do, avoid rushing the process. Each step, especially drying times after cleaning, etching, or priming, requires patience. Cutting corners here means compromising the integrity of the entire system. “Measure twice, cut once” applies to epoxy prep too!
Also, we strongly advise against using acid etching as your primary profile method. While it’s inexpensive and seems easy, acid etching often doesn’t create the consistent, deep profile needed for strong epoxy adhesion. Plus, it can leave behind salts that cause issues. Mechanical grinding is superior for a lasting bond.
Finally, remember to not protect yourself. Failing to wear proper safety gear (like a respirator, gloves, and eye protection) when working with chemicals or grinding concrete puts your health at serious risk. Always prioritize safety!
How long does an epoxy floor take to cure and when can I use my basement?
After all that meticulous preparation and careful application, the final step is patience! Epoxy doesn’t just “dry”; it cures through a chemical reaction. The time it takes varies based on the specific epoxy product you’re using, as well as the temperature and humidity in your basement.
Generally, you can expect:
- Light foot traffic: Most epoxy coatings need at least 24 hours to dry before walking on them.
- Heavy use / Placing furniture: You’ll typically need to wait up to 72 hours before placing furniture or heavy objects on them.
- Full chemical cure: For maximum durability, chemical resistance, and to handle heavy traffic, the epoxy may need up to 7 days to achieve a full chemical cure.
Always refer to the manufacturer’s specific instructions for your chosen product, as cure times can vary significantly. Applying epoxy when the temperature is 50℉ or above is also crucial for proper curing. Cooler temperatures or high humidity can significantly extend cure times and potentially compromise the final finish. Rushing this stage can lead to marks, damage, or a weaker floor.
Your Basement Floor is Prepped: What’s Next?
Whew! Give yourself a pat on the back – you’ve made it through the most critical phase of your basement change. By carefully following these steps for prepping basement floor for epoxy, you haven’t just cleaned a concrete slab; you’ve built the rock-solid foundation for a truly beautiful, durable, and long-lasting floor. We simply can’t stress this enough: the success of your epoxy coating hinges entirely on this meticulous preparation work. It’s often said that 80% of a successful epoxy floor is in the prep, and from our decades of experience, we wholeheartedly agree!
So, what does this meticulous preparation mean for you? It means you’re now ready to enjoy the incredible benefits of a properly applied epoxy floor in your basement. Imagine a waterproof barrier that actively protects your concrete from moisture, a low-maintenance surface that’s a breeze to keep clean, and an attractive finish that truly transforms a typically neglected space into a functional and inviting area for your family. It’s a game-changer!
Now, a quick but crucial word of caution. If your initial moisture tests revealed significant, persistent issues – or if you’ve historically battled with basement leaks or standing water – then professional assessment is truly crucial for a lasting solution. While an epoxy coating creates an amazing surface, it’s important to remember it’s a finish, not a structural waterproofing solution for deeper problems like hydrostatic pressure or major cracks. If you’re dealing with a truly damp or wet basement, putting epoxy over it won’t fix the underlying issue.
That’s where we, the Basement Waterproofing Scientists, come in. We specialize in identifying the exact source of leaks using our specialized equipment, allowing us to fix them for less and provide customized, permanent waterproofing solutions. With 30 years of experience, we’ve helped countless homeowners achieve permanently dry basements, and we back our work with a lifetime guarantee. While the average cost for basement waterproofing is between $4K and $8K, it’s a vital investment that protects your entire home and makes that beautiful epoxy floor truly worthwhile.
Once your concrete is truly ready – whether you tackle the epoxy application yourself or bring in a professional – you’ll have the peace of mind knowing that your foundation is solid. For more information on the various finishes and options available to complete your dream space, explore our insights on Basement Floor Coatings. Your dream basement is within reach, and it all starts with the right prep!

