Understanding Small Foundation Cracks and When to Act
Small foundation crack repair can range from simple DIY fixes to complex professional interventions, depending on the crack’s size, location, and underlying cause. Here’s what you need to know:
Quick Assessment Guide:
- Hairline to 1/8″ wide vertical cracks: Often normal shrinkage, may be DIY repairable
- Cracks wider than 1/8″: Require professional evaluation
- Horizontal or stair-step cracks: Always need immediate professional attention
- DIY repair costs: $75-$225 for injection kits
- Professional repair costs: $350-$2,500 depending on complexity
Most foundation cracks fall into two categories: structural and non-structural. Non-structural cracks – typically vertical and less than 1/8 inch wide – are often caused by concrete shrinkage during curing and don’t compromise your foundation’s strength. However, even small cracks can allow water, insects, and radon gas into your basement, making proper repair essential for maintaining a dry, healthy home environment.
The key to successful repair lies in understanding what caused the crack and choosing the right material for the job. Epoxy injection works best for structural reinforcement, while polyurethane foam excels at stopping water leaks. Hydraulic cement, despite being widely available, often fails because it doesn’t bond properly with existing concrete and can’t accommodate foundation movement.
I’m Darin Garvey, and with over 30 years of experience in basement waterproofing, I’ve helped countless Philadelphia-area homeowners tackle small foundation crack repair challenges. Through Basement Waterproofing Scientists, I’ve learned that proper diagnosis and the right repair approach can save homeowners thousands in future damage.

Relevant articles related to small foundation crack repair:
Is That Crack a Problem? How to Assess Your Foundation
Finding a crack in your foundation can feel like finding a mystery in your home’s story. Is it just a normal part of your house settling into its surroundings, or is it whispering warnings of bigger problems ahead? The good news is that most cracks are actually harmless – but knowing which ones need attention can save you thousands of dollars and a lot of sleepless nights.

Think of foundation cracks like wrinkles – some are just natural signs of aging, while others might indicate underlying health issues. Concrete shrinkage during the curing process is completely normal and happens in nearly every foundation. As your house settles over the first few years, minor shifts in the soil beneath can create small cracks that are simply part of your home finding its permanent position.
Hydrostatic pressure – the fancy term for water pushing against your foundation walls – is often the real troublemaker. When soil around your foundation becomes saturated with water, it can push with tremendous force against those walls. Temperature changes throughout the seasons also play a role, causing concrete to expand and contract in ways that can stress existing weak points.
Identifying Common Causes and Types of Cracks
Understanding what you’re looking at is half the battle when it comes to small foundation crack repair. Each type of crack tells a different story about what’s happening with your foundation.
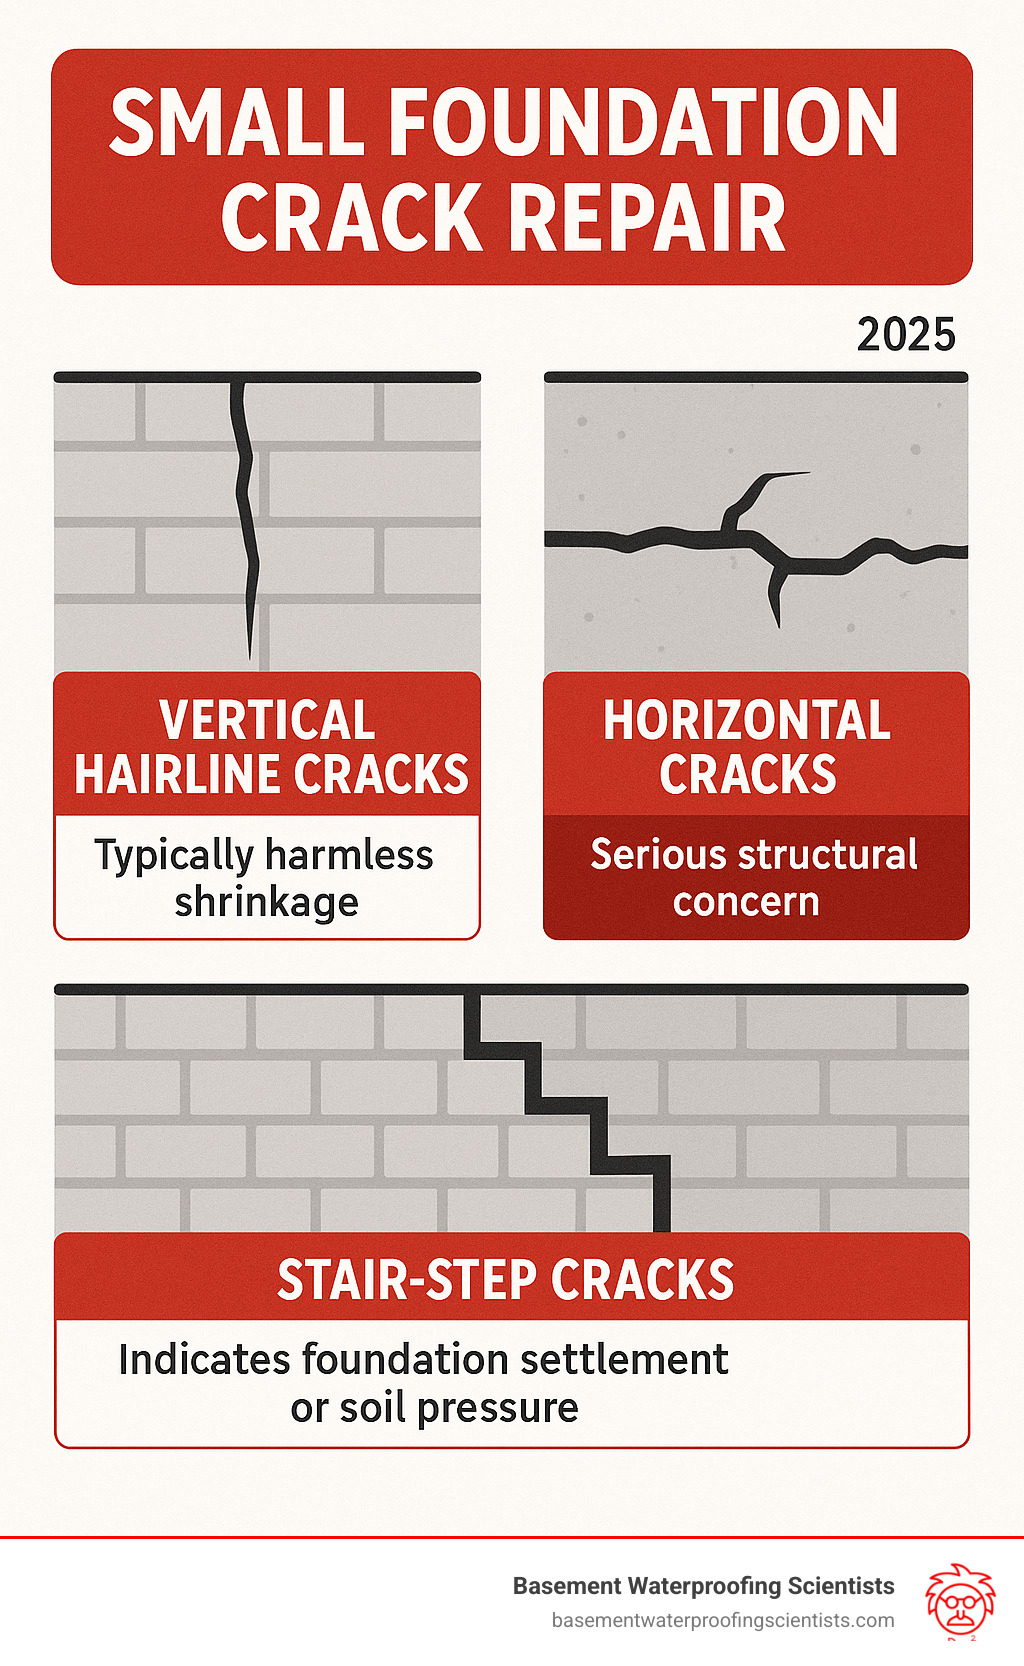
Vertical cracks are usually the friendliest type you’ll encounter. These typically run straight up and down your foundation wall and are most often caused by normal concrete shrinkage or minor settling. If they’re less than 1/8 inch wide and not growing, they’re usually just cosmetic. You’ll see these most commonly in poured concrete foundations, which make up the majority of modern homes in our area.
Diagonal cracks are vertical cracks’ slightly more concerning cousins. They often indicate some differential settling – meaning one part of your foundation is settling faster than another. While not immediately dangerous if they’re small, they deserve monitoring.
Horizontal cracks, however, are the ones that should make you pick up the phone immediately. These almost always indicate serious hydrostatic pressure problems, where water-saturated soil is pushing against your foundation with enough force to crack it horizontally. This type of pressure can lead to bowing walls and eventual structural failure if not addressed quickly.
Stair-step cracks are particularly common in older homes built with concrete masonry units (concrete blocks). These cracks follow the mortar joints in a zigzag pattern and often indicate foundation settling or soil pressure issues. While they might look dramatic, they’re often more manageable than horizontal cracks.
Hairline cracks are the tiny, barely-visible lines that appear in most concrete foundations. These are almost always shrinkage cracks and rarely cause problems unless they start growing or allowing water through.
The difference between concrete masonry units and poured concrete foundations matters here. Poured concrete creates a more uniform wall that’s less prone to cracking, while block foundations have natural weak points at the mortar joints where stair-step cracks typically develop. For comprehensive information about different foundation issues and solutions, check out foundation repair and waterproofing.
When a Small Crack Signals a Big Issue
Sometimes what looks like a simple small foundation crack repair job is actually your foundation’s way of waving a red flag. Learning to spot these warning signs can help you catch serious problems before they become expensive disasters.
Crack width is your first clue. If you can fit a dime into a vertical crack, it’s wider than 1/8 inch and needs professional attention. This width suggests the crack is caused by more than just normal shrinkage.
Bulging walls are never normal. If your foundation walls appear to be pushing inward or bowing outward, especially after heavy rains, you’re looking at serious hydrostatic pressure that needs immediate professional intervention.
Sloping floors inside your home often indicate significant foundation settlement. If you notice your floors aren’t level anymore, or doors and windows are sticking, your foundation might be moving in ways it shouldn’t.
Watch for multiple cracks appearing in the same area or several different areas of your foundation. While one small crack might be normal, several cracks suggest widespread stress or movement that needs professional evaluation.
Actively leaking cracks are serious business, even if they’re tiny. Water intrusion can lead to mold, structural damage, and indoor air quality problems. Plus, if water can get in, so can insects and radon gas.
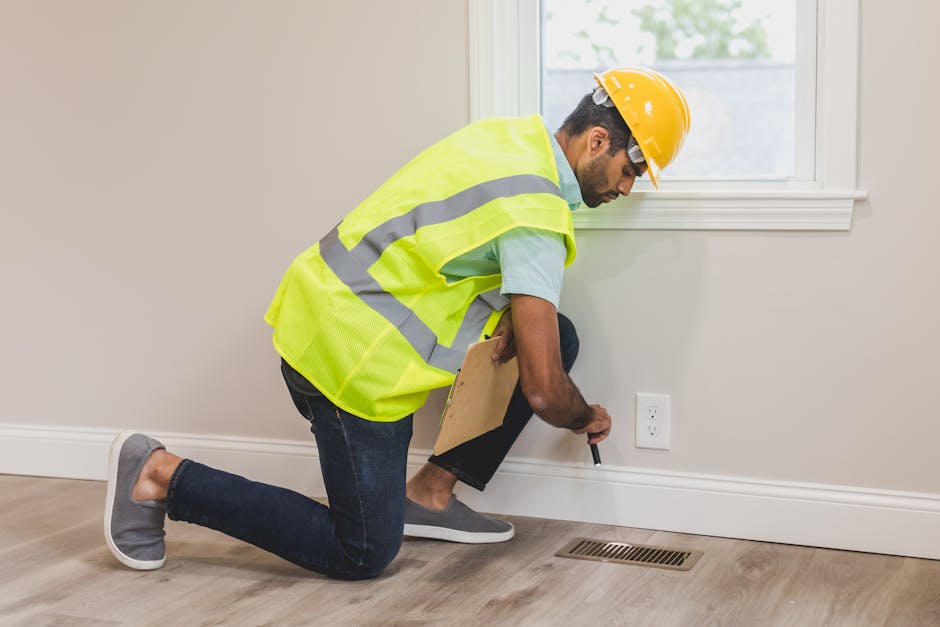
Here’s a simple monitoring trick: mark the ends of any crack with a pencil and write the date next to it. Check back in a few weeks. If the crack has grown beyond your marks, it’s time to call a professional.
When you spot these warning signs, don’t hesitate to get expert help. While minor cracks might be suitable for DIY repair, complex issues require proper diagnosis and professional repair techniques. For serious foundation concerns in Pennsylvania, you can explore foundation repair services in PA to connect with qualified professionals who can properly assess and address your foundation issues.
Choosing Your Repair Material: Epoxy vs. Polyurethane vs. Cement
Once you’ve assessed your crack, the next step in small foundation crack repair is choosing the right material. This is where science meets your basement wall! Think of it like choosing the right tool for the job – you wouldn’t use a hammer to fix a watch, and you shouldn’t use the wrong material to fix your foundation crack.

The good news is that modern injection materials have come a long way. We primarily work with two highly effective options: epoxy for structural reinforcement and polyurethane foam for waterproofing. You’ll also find hydraulic cement at every hardware store, but there’s a reason we rarely recommend it for permanent repairs.
Comparing Your Options for Sealing Cracks
Let’s break down each material so you can make an informed decision about your small foundation crack repair project.
Epoxy injection is like super-strong glue for concrete. When properly injected, it literally welds the crack back together, restoring the original strength and integrity of your foundation wall. This makes it perfect for structural repairs where you need to reinforce the concrete. The downside? Epoxy is fairly rigid once it cures, so if your foundation continues to move even slightly, the crack might reopen. It also works best on dry surfaces, which can be tricky in a basement environment.
Polyurethane foam injection is our go-to hero for stopping water leaks. This remarkable material reacts with moisture and expands up to 35 times its original volume, filling every nook and cranny of the crack. What makes it special is its flexibility – it stays somewhat elastic after curing, which means it can handle minor foundation movement without cracking again. Plus, it actually works better on moist surfaces, so you don’t need to wait for that weeping crack to dry out completely.
Hydraulic cement seems appealing because it’s cheap, readily available, and sets quickly even underwater. But here’s the problem: it’s essentially creating a rigid patch that doesn’t bond well with your existing concrete. It’s like putting a cast on a flexible joint – something’s got to give. Usually, the crack just reopens right next to the patch, or new cracks form nearby. We’ve seen this countless times in our 30 years of experience.
Here’s how these materials stack up for different situations:
| Material | Pros | Cons | Best Use Cases | Average Cost (Material Only) |
|---|---|---|---|---|
| Epoxy | Restores structural strength, “welds” concrete back together. Excellent adhesion. Good for preventing radon/insect entry. | Less flexible; can re-crack if movement occurs. Requires dry surfaces for best results. Can be messy to work with. | Structural cracks where load-bearing capacity needs restoration. Hairline to wider cracks (up to 1/2 inch) in poured concrete walls that are stable and dry. Cracks where you need to prevent further spread and reinforce the wall. | $75 – $225 (DIY Kit) |
| Polyurethane Foam | Excellent for stopping water leaks, expands to fill voids. Flexible; accommodates minor foundation movement. Adheres to moist surfaces. Ideal for non-structural cracks. | Not for structural reinforcement. Can be messy if over-injected. Requires specific injection equipment. | Non-structural leaking cracks in basement walls. Cracks that are actively seeping water. Sealing around pipe penetrations. Cracks where flexibility is desired to prevent re-opening due to minor movement. | $75 – $225 (DIY Kit) |
| Hydraulic Cement | Inexpensive and widely available. Sets quickly, even in wet conditions. | Very rigid; doesn’t bond well long-term. Prone to cracking again next to the patch. Not suitable for structural repair or long-term waterproofing. | Temporary patches for minor leaks. Filling small holes or gaps in non-critical areas. Not recommended for permanent foundation crack repair due to its rigidity and poor long-term bonding properties. | $20 – $40 |
The key is matching the material to your specific problem. Got a dry, stable crack that needs structural reinforcement? Epoxy is your friend. Dealing with an actively leaking crack that might move slightly over time? Polyurethane foam is the way to go. Need a quick temporary fix while you plan a proper repair? Hydraulic cement might buy you some time, but don’t expect it to last.
For a deeper dive into the materials we use and why they work so well, explore our resources on concrete wall crack sealers.
Your Step-by-Step Guide to Small Foundation Crack Repair
Ready to tackle that crack yourself? Great! This section walks you through the complete process for small foundation crack repair using an injection kit. Before we dive in, let me be clear – this guide is specifically for non-structural, stable cracks that are 1/8 inch wide or smaller. If your crack doesn’t fit this description, it’s time to call in the professionals.

The secret to successful injection repair lies in patience and preparation. Think of it like baking a cake – skip steps or rush the process, and you’ll end up with a mess instead of the perfect result you’re after. Most DIY kits use low-pressure injection systems, which means you won’t need heavy drilling equipment. This makes the job much more manageable for weekend warriors.
Essential Tools and Materials for Small Foundation Crack Repair
Before you start your small foundation crack repair trip, let’s gather everything you’ll need. Most injection kits come with the main materials, but you’ll need some basic tools that you probably already have in your garage or basement.
Safety comes first – and I can’t stress this enough. Safety glasses and work gloves aren’t optional accessories; they’re essential protection when working with chemicals and concrete debris. Your eyes and hands will thank you later.
For cleaning and preparation, you’ll need a stiff wire brush or a drill attachment to scrub away loose concrete, old paint, or that white chalky stuff called efflorescence. A shop vacuum or air compressor is crucial for clearing out all the dust and debris – think of it as creating a clean canvas for your repair work.
Your injection kit should include the repair material (epoxy or polyurethane), injection ports, and surface sealer. Make sure the kit matches your crack width and type. You’ll also need a standard caulk gun – nothing fancy required. Most kits are designed to work with the basic caulk gun you’d use for bathroom projects.
Round out your toolkit with mixing supplies like small containers and stirring sticks (often included in kits), a putty knife or small trowel for applying surface sealer, and some mineral spirits or cleaner for cleanup. Always check your kit instructions for specific cleaning recommendations.
For more comprehensive foundation repair guidance, check out A guide to repairing a concrete foundation.
The 7-Step DIY Injection Process
Now for the main event – let’s walk through each step of the repair process. Take your time with each step; rushing will only lead to problems down the road.
Step 1: Clean the crack like your life depends on it. This might be the most boring step, but it’s absolutely the most important. Use that wire brush to scrub away everything – loose concrete bits, dirt, old paint, and any white crusty deposits. Then vacuum or blow out every speck of dust and debris. If you’re using epoxy and the crack is damp, break out a hair dryer to get it as dry as possible. Clean surfaces create strong bonds.
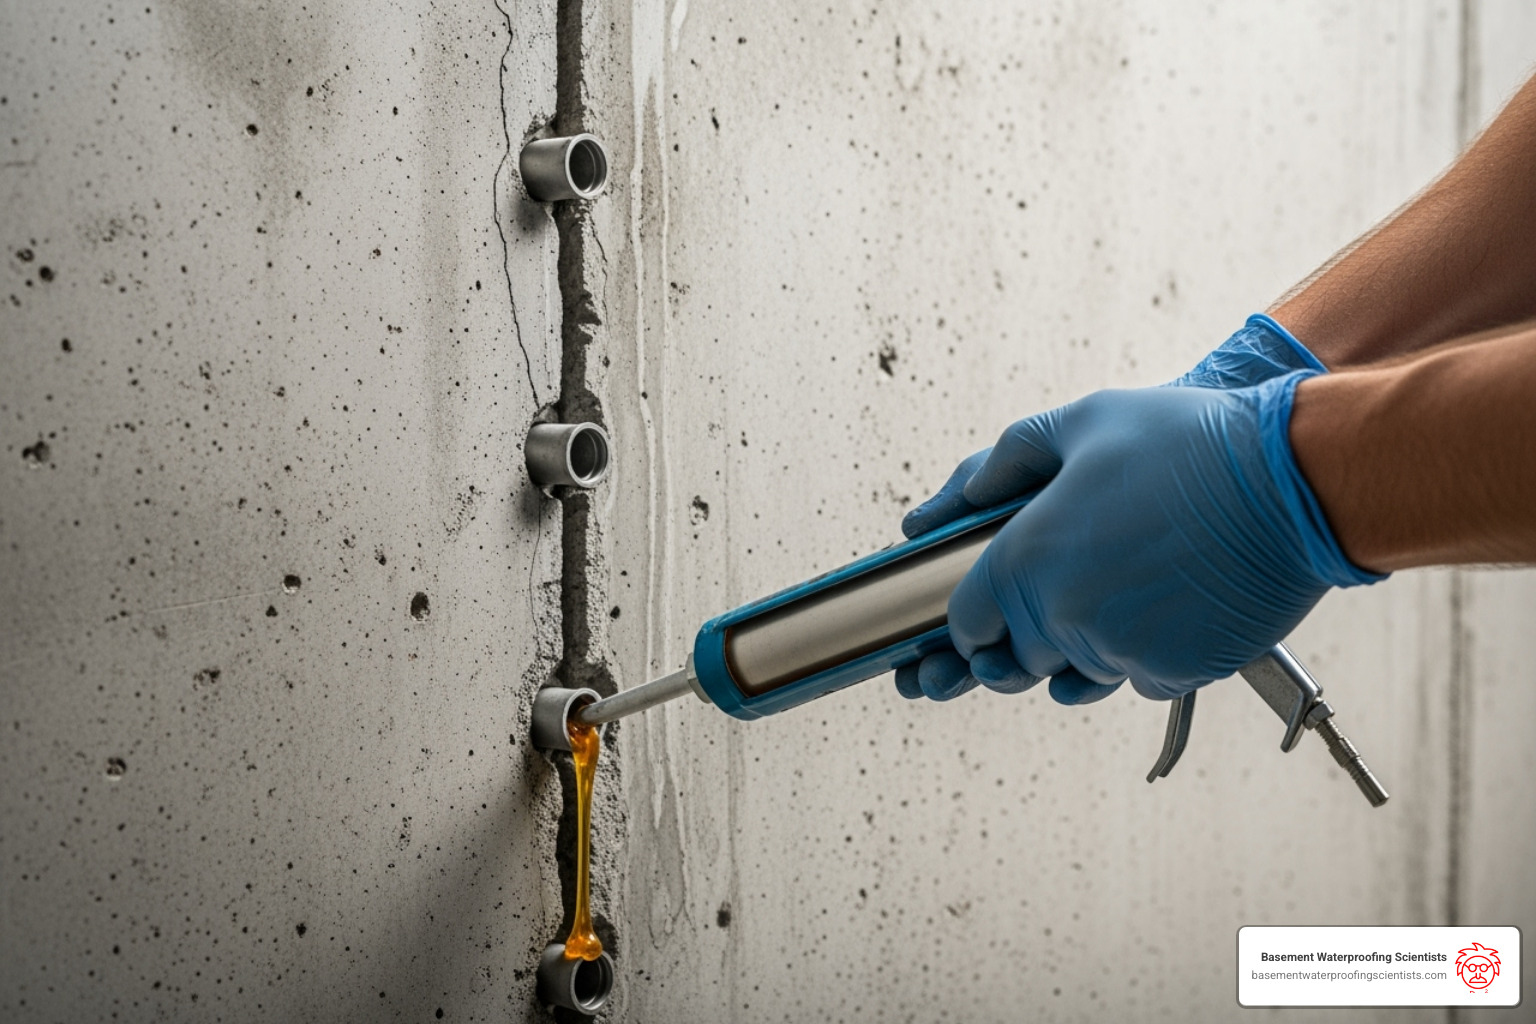
Step 2: Install injection ports at regular intervals along the crack. These little plastic gateways should be spaced about 6 to 8 inches apart, with one positioned at the very bottom of the crack. Secure them with the quick-setting adhesive that comes with your kit or use a hot glue gun. The key is making sure each port lines up perfectly with the crack opening.
Step 3: Apply surface sealer to create a temporary dam that holds your injection material in place. Mix the surface sealer according to your kit’s directions – this is usually a hydraulic mortar or specialized epoxy paste. Apply a continuous bead along the entire crack length, covering the crack itself and sealing around each port base. Smooth it with your putty knife to create an even layer. Now comes the hard part – waiting for it to cure, typically 6 to 10 hours.
Step 4: Mix the injection material following your kit’s instructions to the letter. Some kits have two-part epoxies that need precise mixing ratios, while others come with convenient pre-measured cartridges that snap right into your caulk gun. Don’t get creative with the mixing ratios – the manufacturers spent lots of time and money figuring out the perfect formula.
Step 5: Inject the crack starting from the bottom and working your way up. Load your mixed material into the caulk gun and connect it to the lowest injection port. Inject slowly and steadily until you see material start oozing out of the port directly above. Cap off the lower port and move up to the next one. This bottom-up approach ensures complete filling and pushes out trapped air that could compromise your repair.
Step 6: Cure and seal ports requires patience – something we’re all short on these days. Allow the injected material to cure completely according to your kit’s timeline. Epoxy often needs several days, while polyurethane typically sets faster. During this curing time, the material hardens and creates that permanent seal you’re after.
Step 7: Remove ports and finish the job with some light cleanup. Once everything has cured, carefully cut off the port necks flush with the wall using a hacksaw or utility knife. You can lightly sand the area and apply a patch compound if you plan to paint over the repair. The result should be a smooth, professional-looking finish.
That this process works best for interior cracks. Exterior foundation issues often require professional attention due to excavation and drainage considerations. For more information about exterior repairs, visit our guide on Fixing exterior foundation cracks.
DIY vs. Hiring a Pro: Making the Right Call
You’ve got the spirit of a true DIY enthusiast, and we applaud that! For the right kind of crack, taking on a small foundation crack repair yourself can be a rewarding and cost-effective project. But there’s a fine line between a successful weekend warrior triumph and a costly, messy lesson learned. We’ve seen it all over our 30 years in the business, and sometimes, calling in the professionals is simply the smartest move.

Let’s be honest about the trade-offs. We want you to succeed, whether that means tackling the project yourself or knowing when to step back and let the experts handle it. The key is understanding what you’re getting into and making an informed decision based on your specific situation.
The Pros and Cons of DIY Small Foundation Crack Repair
The biggest draw to DIY repair is obvious: cost savings. Those DIY injection kits running $75 to $225 look pretty attractive when you’re comparing them to professional repairs that can start around $350 for a single crack. For a truly simple, stable hairline crack, this can represent real savings.
There’s also something satisfying about immediate action. You spot a small crack, head to the hardware store, and tackle it the same weekend. No waiting for contractor schedules or estimates. Plus, there’s that undeniable sense of accomplishment when you step back and admire your handiwork.
But here’s where reality sets in. The potential for failure is significant, and it’s not always about your skill level. The crack you see on the surface might be just the tip of the iceberg. Hidden cavities behind the wall, multiple failure points, or complex water pathways can turn what looks like a simple crack into a puzzle that even experienced contractors find challenging.
When DIY repairs fail, you’re often looking at a more expensive fix down the road. We’ve seen homeowners spend $200 on a DIY kit, watch it fail within a year, and then need a professional exterior repair that costs several thousand dollars. That lack of warranty means you’re essentially gambling with your home’s foundation.
The time commitment is another factor people underestimate. Proper surface preparation, waiting for cure times, and doing the job right takes patience. Rush the process, and you’re almost guaranteed to have problems later.
When to Absolutely Call a Professional
While we encourage appropriate DIY projects, there are clear situations where attempting small foundation crack repair yourself isn’t just inadvisable – it’s potentially dangerous to your home’s structural integrity.
Horizontal cracks are the big red flag. These aren’t shrinkage cracks; they’re screaming that your foundation wall is under serious pressure. We’ve seen horizontal cracks lead to complete wall failure when not addressed properly. These require specialized techniques like wall anchors or carbon fiber reinforcement that simply aren’t available in DIY kits.
Bowing or bulging walls fall into the same category. If you can see your foundation wall pushing inward or outward, especially after heavy rains, you’re looking at imminent structural issues that need immediate professional attention.
Here’s a simple test: if the crack is wider than 1/8 inch (or you can fit a dime into it), it’s moved beyond typical DIY territory. These wider cracks often indicate ongoing foundation movement and benefit from professional-grade materials and injection techniques that create more reliable, long-lasting seals.
Multiple significant cracks or cracks that are actively growing suggest foundation settlement or other systemic issues. You might fix one crack successfully, but if the underlying problem isn’t addressed, you’ll be playing whack-a-mole with new cracks for years.
Signs of major settlement extend beyond just the foundation walls. Doors and windows that suddenly stick, floors that feel uneven, or new cracks appearing in your home’s drywall all point to foundation movement that requires comprehensive evaluation and repair.
Finally, if you’re planning to sell your home, a transferable warranty from a professional repair can be invaluable. Potential buyers want assurance that foundation issues have been properly addressed, and a professional warranty provides that peace of mind in a way that DIY repairs simply can’t.
The bottom line? If you have any doubt about the severity of your crack or your ability to repair it properly, it’s worth getting a professional opinion. A consultation might cost you a bit upfront, but it can save you thousands in the long run. For reliable foundation solutions in our service areas, you can Find a foundation contractor near you through our network of trusted professionals.
Conclusion
Tackling small foundation crack repair doesn’t have to keep you up at night. With the right knowledge in your toolkit, you can confidently assess whether that crack is a simple DIY weekend project or something that needs professional attention. We’ve covered everything from identifying the difference between harmless shrinkage cracks and serious structural warnings, to choosing between epoxy and polyurethane materials, and even walked through the complete injection process step by step.
The most important takeaway? Protecting your home’s value starts with correct diagnosis. That hairline crack you spotted might be completely normal concrete shrinkage, or it could be the first sign of a foundation settlement issue. Understanding the difference can save you thousands of dollars and give you genuine peace of mind.
DIY small foundation crack repair works beautifully for stable, non-structural cracks under 1/8 inch wide. But when you see horizontal cracks, bowing walls, or multiple cracks appearing, it’s time to put down the injection kit and pick up the phone. These situations require the expertise and specialized equipment that only professionals can provide.
At Basement Waterproofing Scientists, we’ve spent 30 years perfecting our approach to foundation and basement issues. Our unique advantage lies in using specialized equipment to pinpoint exactly where leaks are coming from, which means we can fix them for less while providing long-term solutions. We believe in competitive pricing backed by our lifetime guarantee – because your basement should be permanently dry, not just temporarily patched.
Whether you’re dealing with a simple crack in Bensalem Township or a complex foundation issue in Upper Darby, we’re here to help. Our expert inspections take the guesswork out of foundation problems, and our customized solutions ensure you get exactly what your home needs.
Don’t let uncertainty about that crack turn into a bigger headache down the road. For a comprehensive and guaranteed solution to any foundation crack, trust the experts who’ve been protecting Philadelphia-area homes for three decades. Schedule your professional basement wall crack repair today, and sleep soundly knowing your foundation is in good hands.

